Tutorials
Scrundlewear color block, burrito method and other tips
We are hip deep in underwear making at my house. I love that Stitch Upon a Time has multiple variety and sizes to fit everyone and their preferences! Today, I want to visit getting the most out of your fabric with a variation of color blocking. We all know that undie making is terrific for scrap busting. How do you make those scraps go even further? I recently taught a class using the Brazi and Scrundlewear patterns. This was the first time that several of my students had used a PDF pattern. My students were not the only sewists learning new tricks in class. One person used up-cycled fabric, while others used the luxurious Art Gallery knits that Jennifer carries in the shop. It got me thinking, how can we better use our resources here? First of all, when tracing out your pattern, you can use up-cycled materials to do that. My zero waste student used up-cycled paper to trace out her pattern, in the past I have used plastic grocery bags that were torn or otherwise not useful. You can do this too!
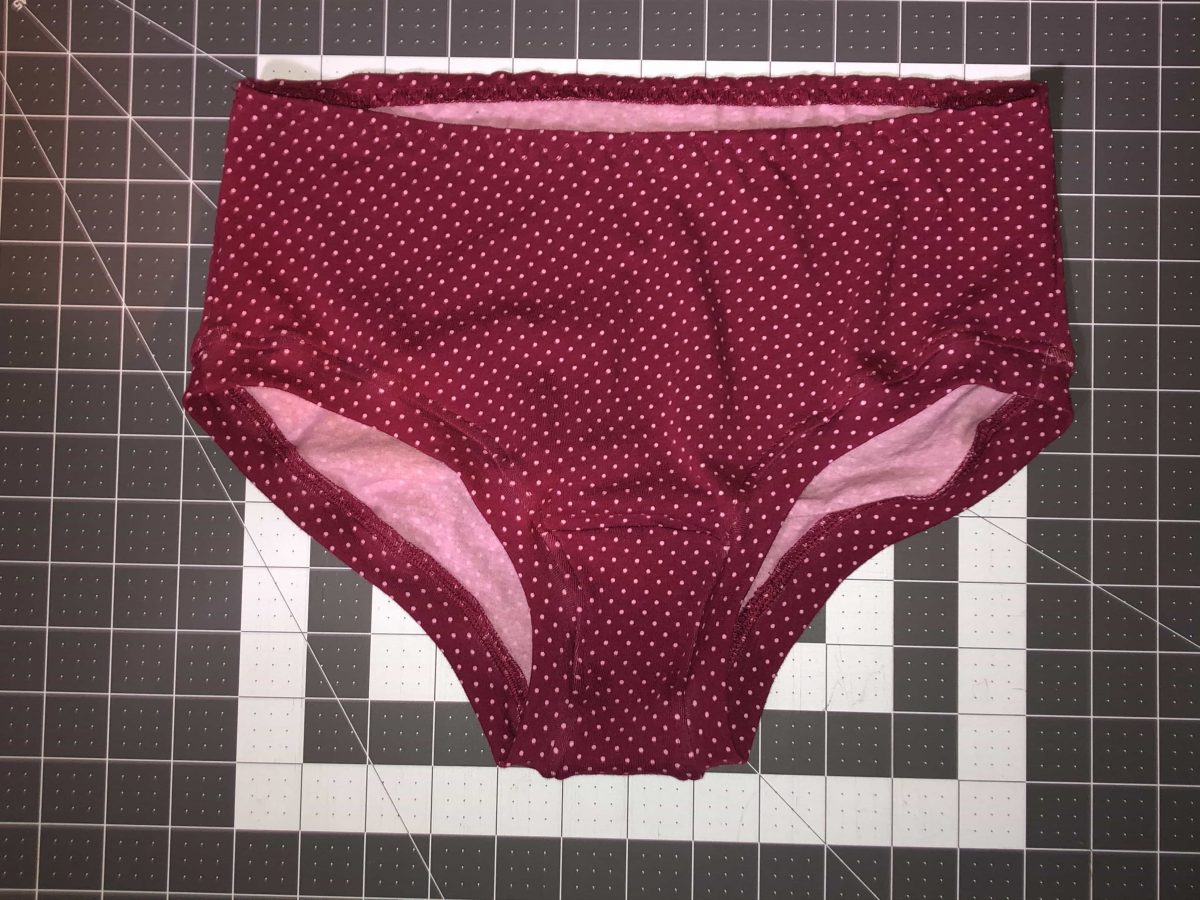
Fold your chosen tracing paper in half. If it is wrinkled, possibly press it flat with a warm iron. Match up that fold line with the center front or back of the pattern, and trace out the size and option you wish. Next, fold the tracing paper in half, the other direction, so that you can see the lines you traced, and cut. This way you get a full pattern piece. Do the same with the back piece. For the liner we will be making a small change. Place the liner piece under your traced front piece, matching the angled seams where they are sewn to the back, and draw a dotted line across the front where the liner ends. Fold this pattern under at the dotted line. Next, trace out your liner on the fold like above, but add one inch to the top. This makes room for a 1/2 inch seam. If you wish, you can curve both of these lines slightly, and flare out the top to make for easier seam matching, like the photo below.
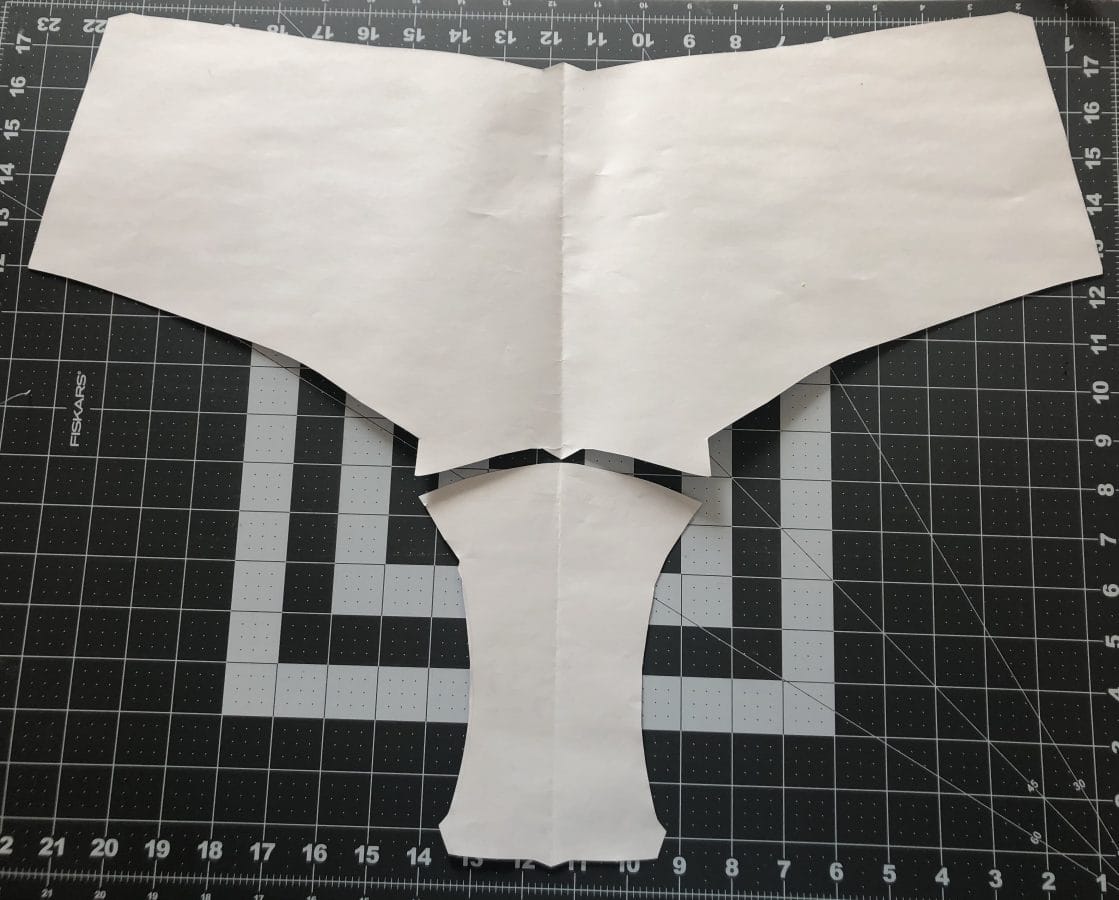
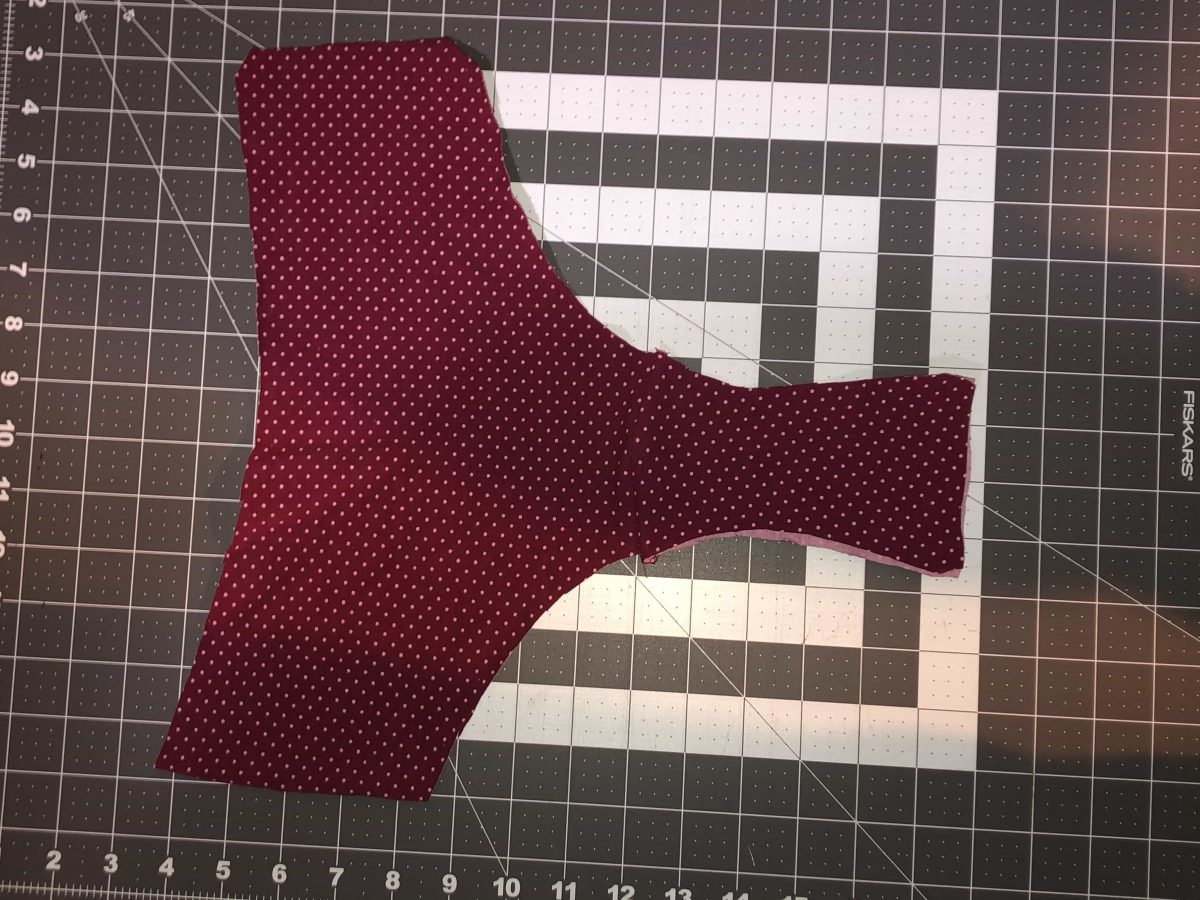
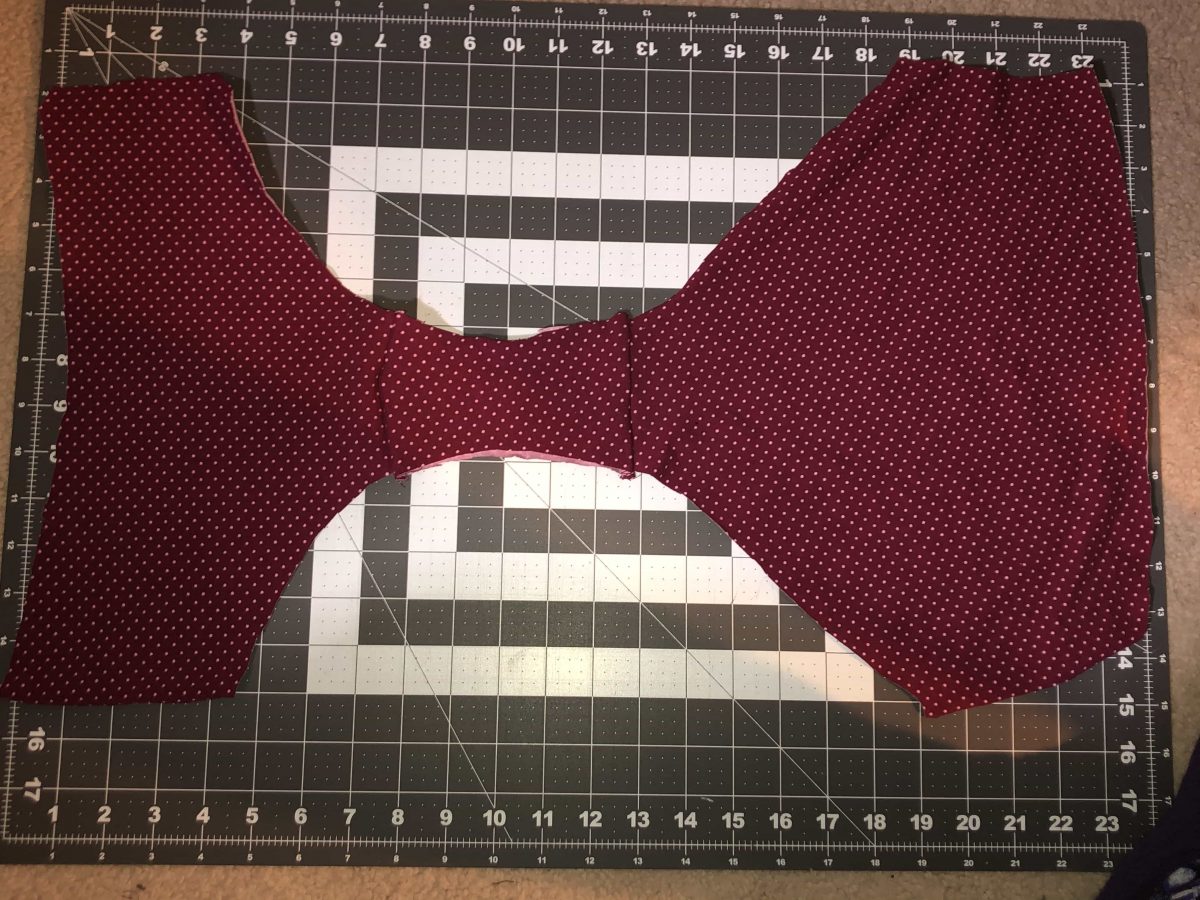
For fabric conservation purposes, this changes the T shaped front piece into two almost rectangular pieces that will fit more snugly onto fabric, or on to scraps! With a full pattern piece for front and back and two gussets, you can cut two pair on one folded piece of fabric!
With the front, back and gusset (which I mislabeled here with front on the back and back on the front – oops!) as three separate pieces, fully opened, it is simple to nest them in closer together. Tip, make a notch at the center front of pieces, so you do not need to think about it later when adding bands or elastic. It also makes quick work of cutting from scraps! Back in the seventies, when I learned to sew swim wear, we used a separate gusset like this. I tried to find out why we no longer do that, but no luck. I suspect it was time saving related. I did learn that in some places, the gusset is called a bridge, as it bridges front and back.

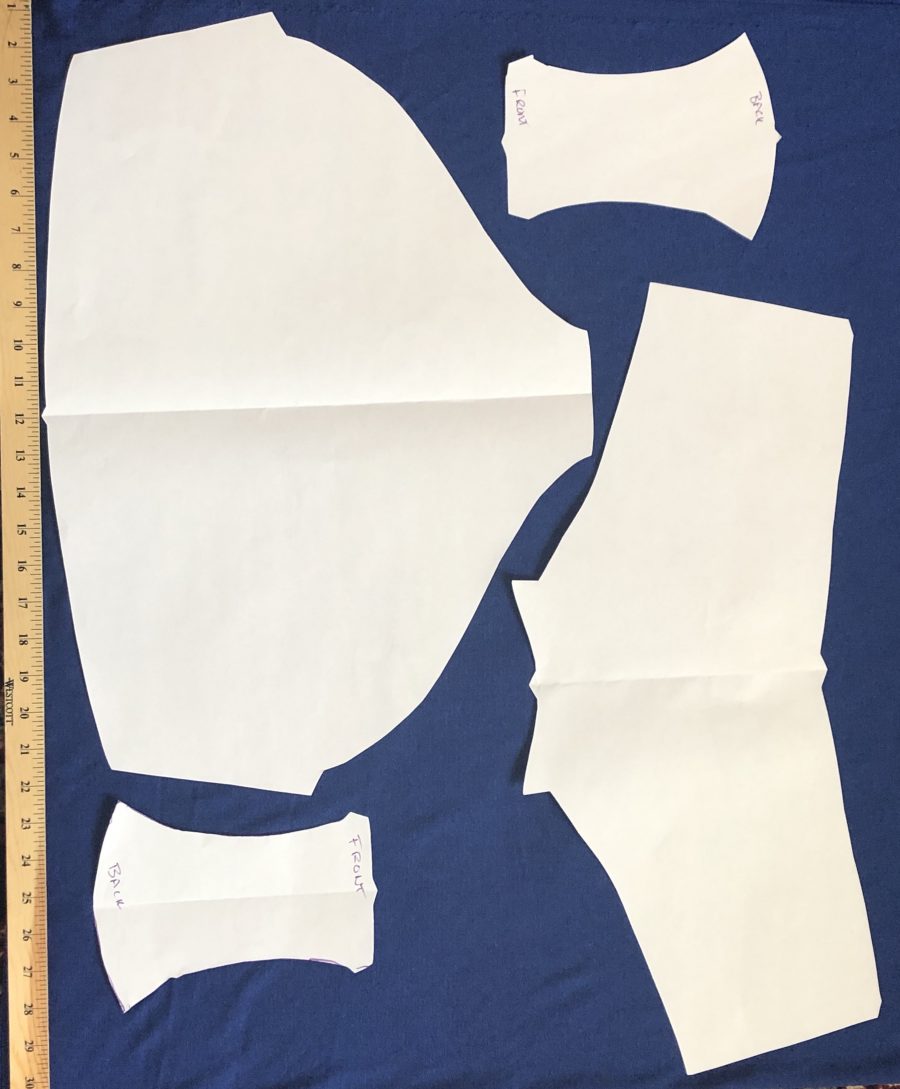
We will start at the front piece. Stack your pieces as follows.
– Gusset #1 right side up
– Front piece right side down
– Gusset #2 right side down and pin in the center.
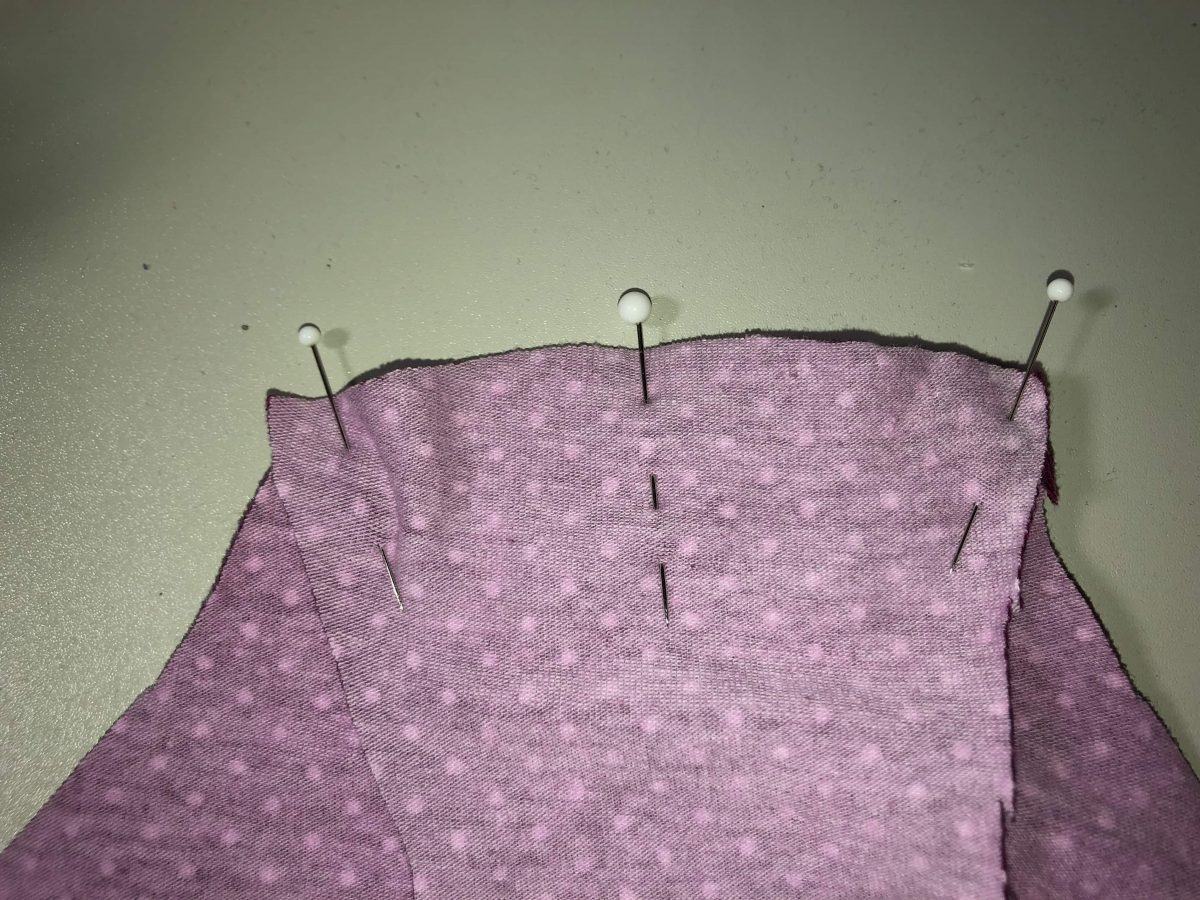 Next, align the sides of the seams so that the raw edges are together, pin and sew or serge this seam with a 1/2 inch seam allowance.
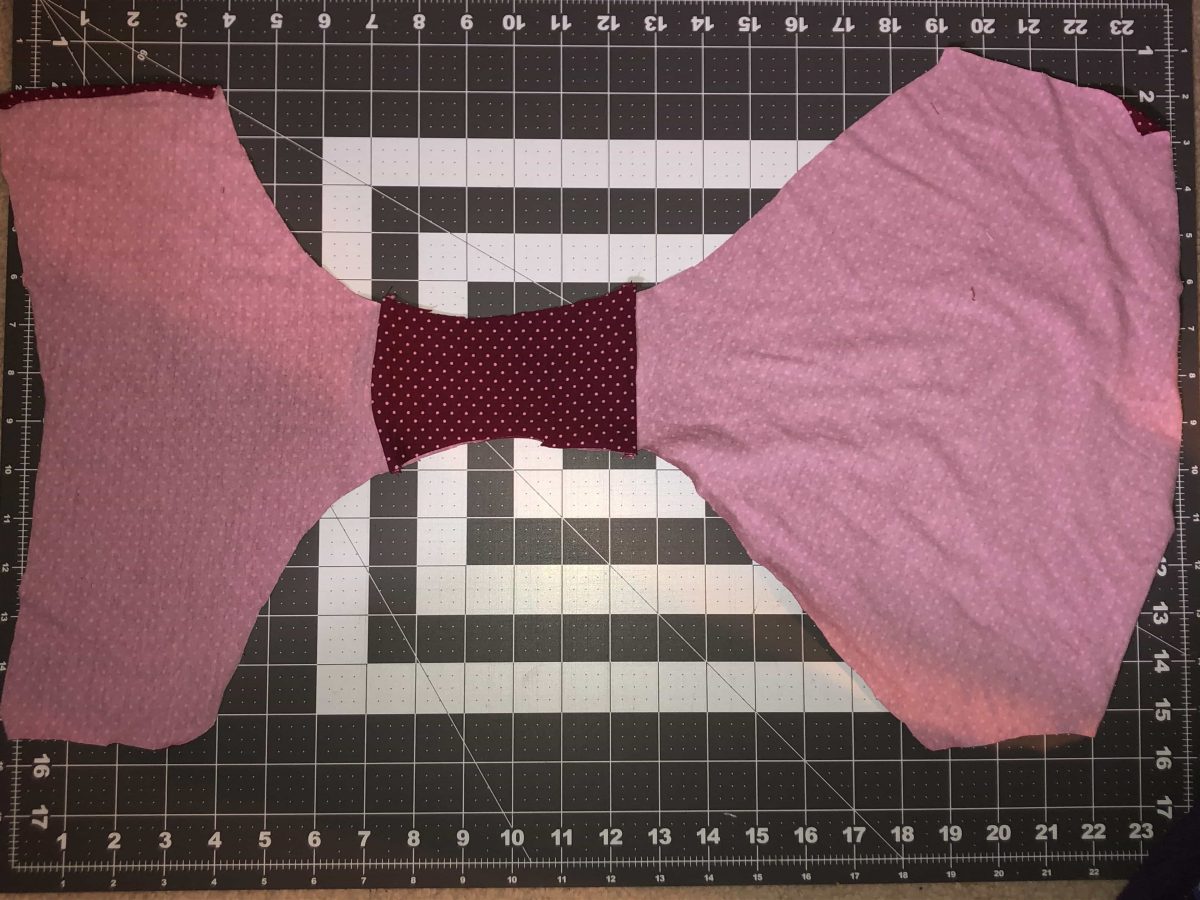
Open up the seams, and you have a front and gusset that looks similar to the regular front. You can use a 100% cotton or bamboo inner gusset if you like, particularly if the body of your panty is a synthetic. This is a thin cotton lycra left over from a Mary Peplum dress that I hacked.

On to making the burrito seam. At least that is what we call it here in the southwest. Other parts of the world may call it a hot dog method, but I digress. Make sure the front and back of your Scrundlewear are right sides together. Pin the gusset to the back right sides together. Open the top gusset and flip this over.
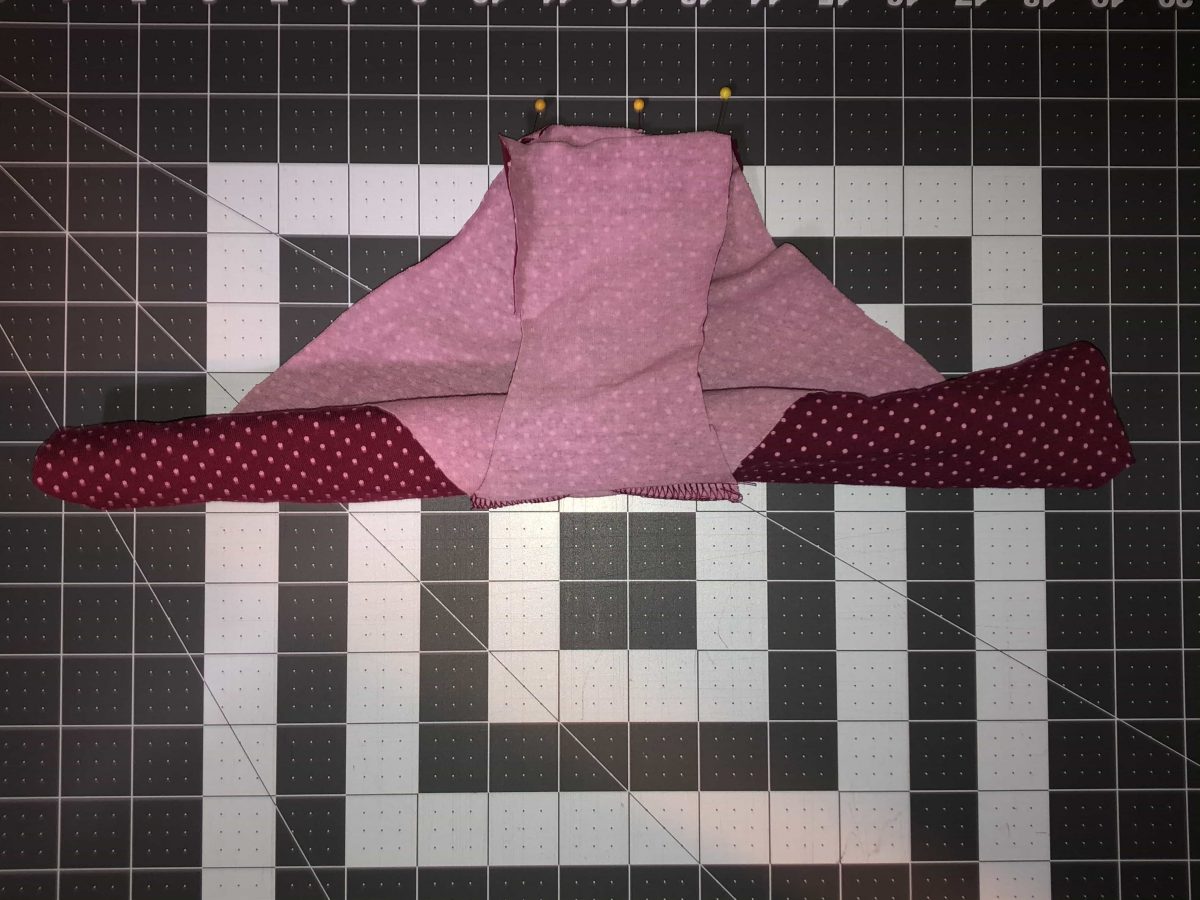
In the photo above, the project is flipped over so that that loose gusset can wrap around to the other side, and meet up with the previously pinned pieces. Again, we have gusset, panty, gusset, with both gussets right sides together, and the panty in between. Sew or serge with 1/2 inch seam allowance.
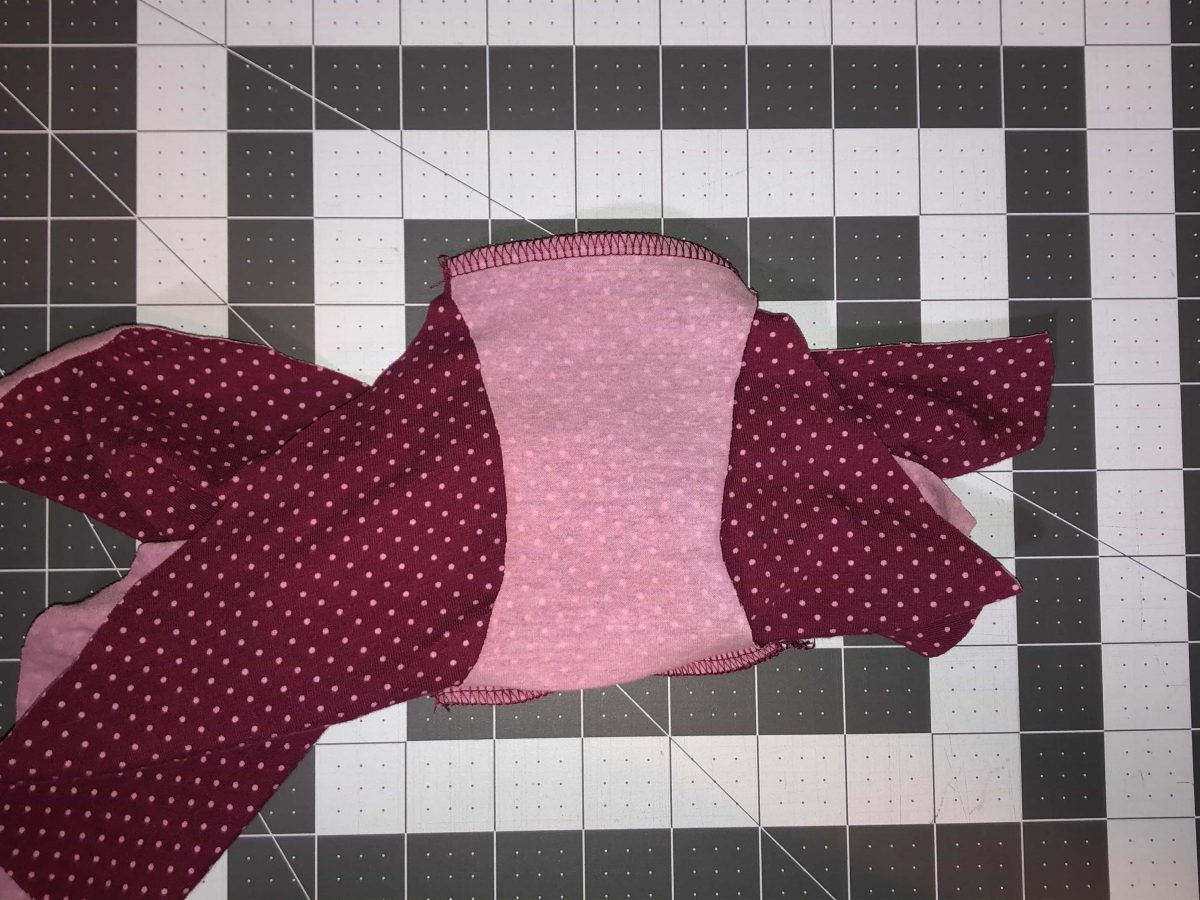
Here are both ends of the gussets sewn, and the panty parts burritoed inside. Time for the big reveal! Gently tug those panty parts so that the gusset is flipped over and wrong sides together. It will look a little like the photo below when you are done.
And the inside will look like this! One fully attached and enclosed gusset. Sew the side seams and attach the bands as per instructions, and you are done.
Fun fact, the breakfast burrito originated in the mid seventies, not far from where I live when folks walking around the balloon fiesta needed a grab and go breakfast. Since teaching a class last week, I have made nine pair of Scrundlewear in four different sizes. Like the breakfast burrito, they are a little addicting.
Happy sewing! Joan
Thank you for this tutorial. I love this method. I do have a question. I am making the size large boyshort style with knit band waist and legs. When I placed the liner on the front to draw the dotted line it extends quite far into the front of the panty. When I fold the pattern under as suggested it creates a straight line across and I actually end up folding some of the leg as well. Is the how it suppose to be? It doesn’t look that way on the picture. Also how do you shape it as it is showing on the picture? Is there a video showing this? Would love to see how this is done.