Tutorials
Sizzing Shirtzie cross back hack
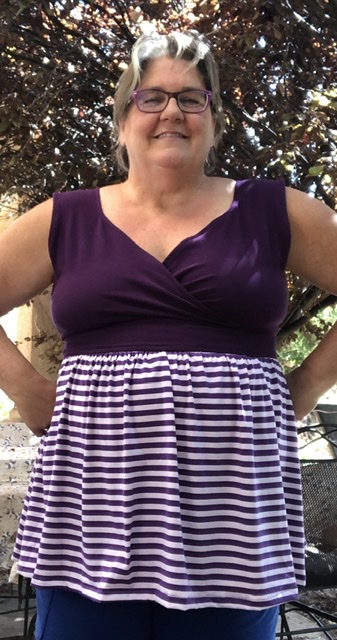
Mercury is rising, afternoons are sizzling. and with more time indoors, I had some fun making another Shirtzie.
Here is how I did it, so you can try it too!
Skip the bra and add a little back interest with this hack. Cut the front as directed in the pattern.
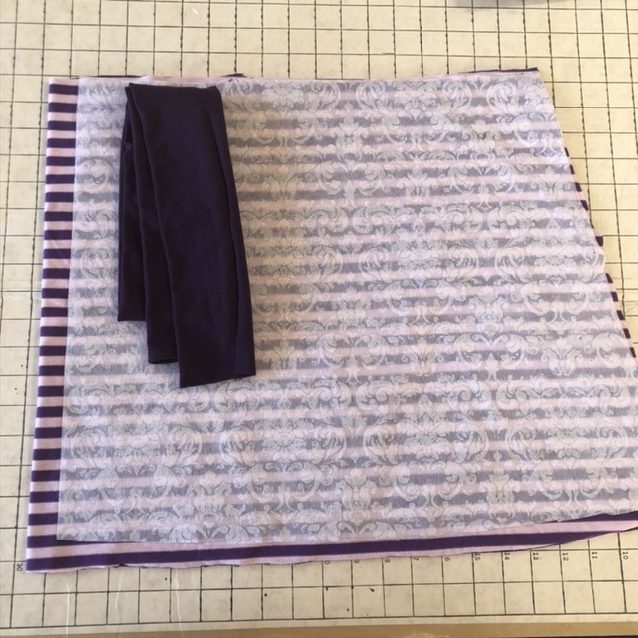
Cut your skirt and bands as directed also. I wanted a fuller skirt, so I added a little to the center front and back.
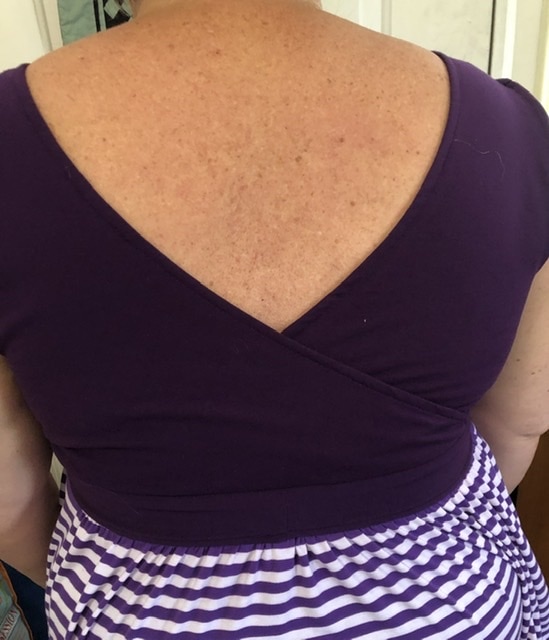
The back is where we deviate from the pattern.
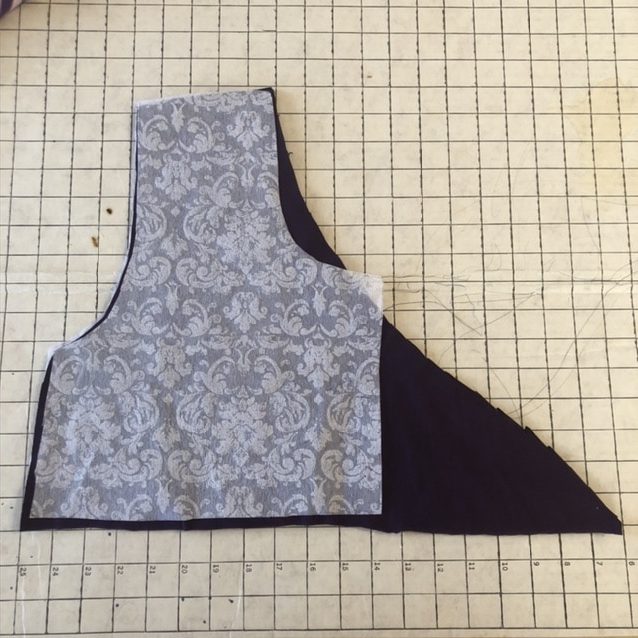
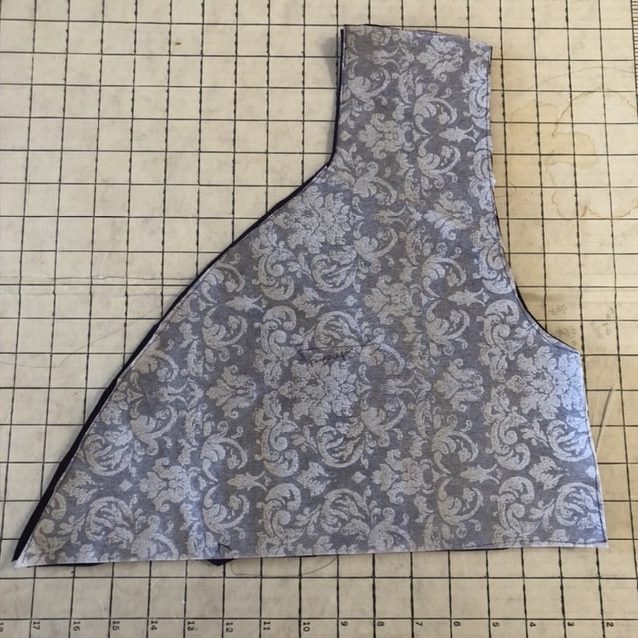
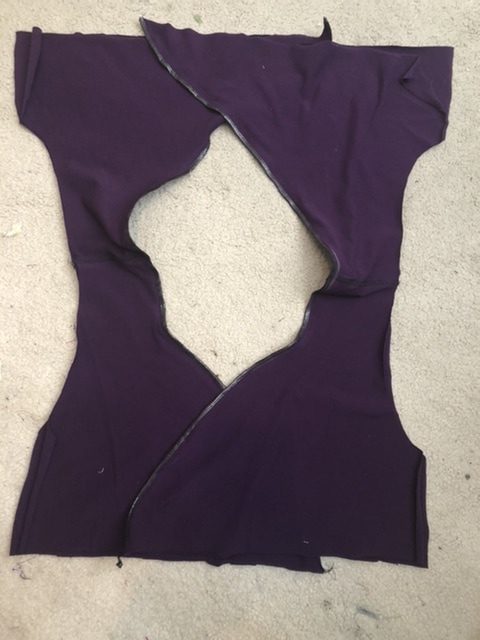
Draw a gentle curve from the top of the inside shoulder seam to about 3/4 the way to the other side if the back was cut on the fold. In this case, half of the bottom of the back piece is 11 inches across. 75% of that is approximately another 8 inches. You can see that I added a notch at the spot where the center line will be. This will be handy later. Before you get to the machine, lay out two front pieces right side up, and two back pieces, right side down on top of those, making sure the armscyes match up. Repeat this. Here is where it would be nifty to line in a different fabric.
Sew the four shoulder seams. I top stitched mine but that is not critical. Make sure that you have backs to backs and fronts to fronts right sides together. Make a seam along the inside neck line from the front to the back. I added 3/4 inch clear elastic to stabilize that seam. Braided elastic or 1/4 inch elastic would work too. Do not stretch the elastic, sew it to the edge. Try to be sure that the elastic is on the same side. This means that you will start from the front edge on one side and from the back edge on the other.
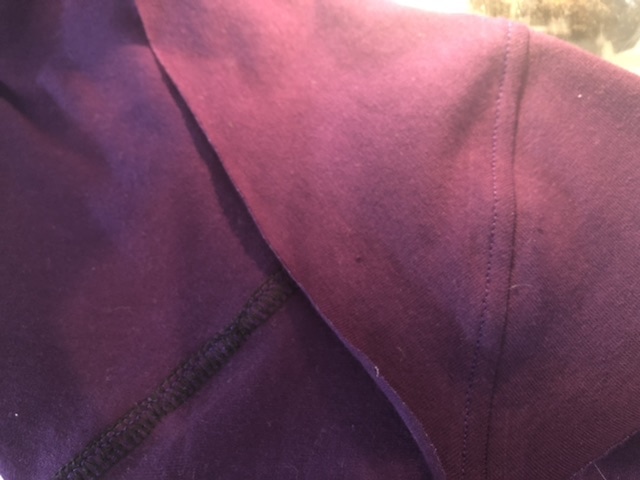
Next, under stitch the seam with the elastic. It will help to roll the seam to the back side of your garment. Push the seam towards the elastic and top stitch from the right side of the garment. Use and open toed embroidery foot or a foot with a guide to get more even stitching.
Fold your pieces so that they are right sides facing again, and stitch the armscyes. In this photo, I moved my needle to the left so that I stitched a 3/4 inch seam. Since the Shirtzie is really fitted, and I wanted mine to be sleeveless, I needed the arm openings to be a tad bigger. You can see in this photo that while the seam may look straight it is really a tiny zig zag. Lightening stitch is great. Test your stitches on scraps, to be sure there will be enough stretch in your seams. We want your outfit to pop, not your seams!
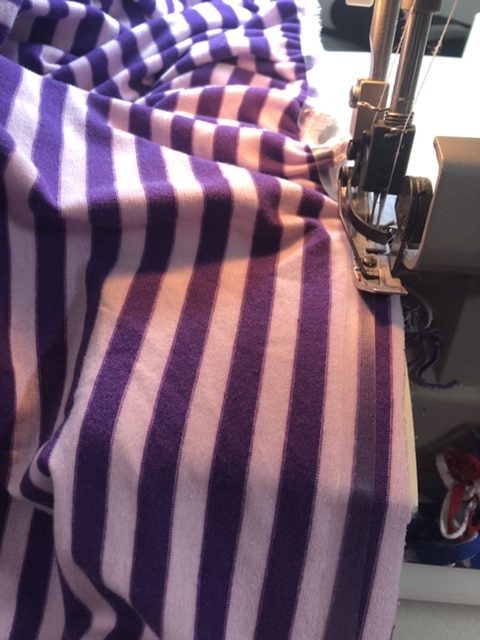
Next, use your serger (or scissors) to trim that seam allowance.
I used that wobble stitch, or narrow short zig zag to stitch the side seams. In this medium weight Cotton spandex, the seams will have less bulk if they are machine sewn and opened.
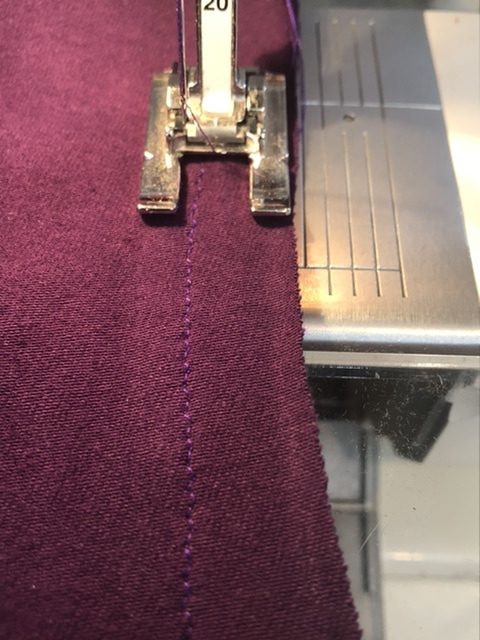
Now is the time to top stitch (from the right side) the neck opening of your Shirtzie. Again my trusty Bernina #20 foot is key to straight top stitching. Same wobble stitch that looks straight, but has stretch. An open toed embroidery foot will do the same.
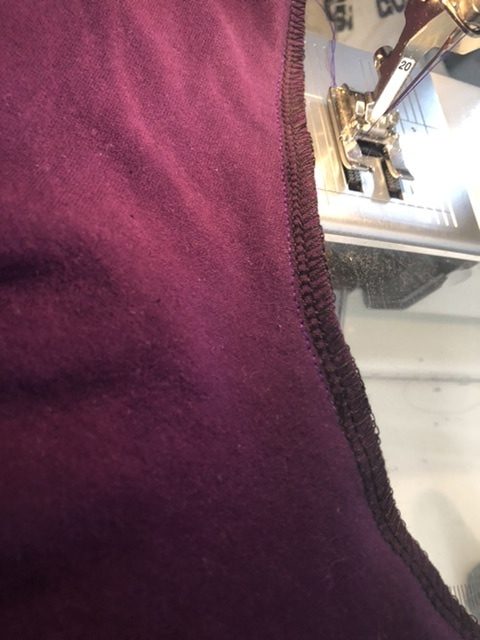
Top stitch the arm openings, and show the fabric that you are boss, by basting with a 3 wide and 3 long zig zag along the bottom edges of the two layers of each side of your bodice.

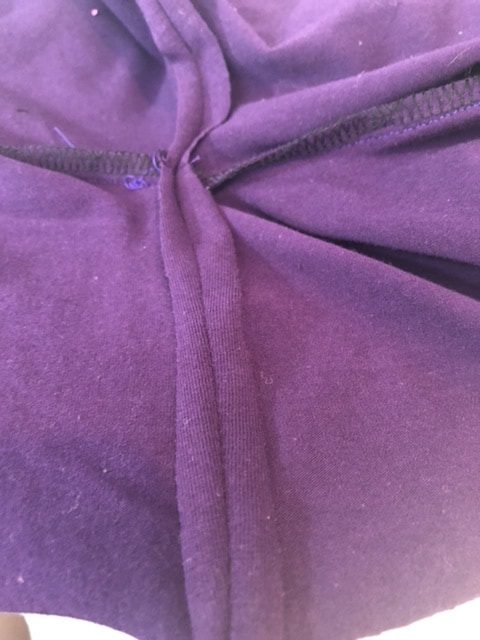
Really love the almost sweetheart neckline of the Shirtzie front. Match up those center notches, and if you are smarter than I am, you will match up the center notches and safety pin the bottom edges together. That way you can try this on, and adjust the crossover for more modesty if you need it.

Next is the back side. You may be able to see the zig zag basting along that bottom edge. Again, use safety pins to attach the two sides along the bottom. I tried mine on this way, and it was a little painful.

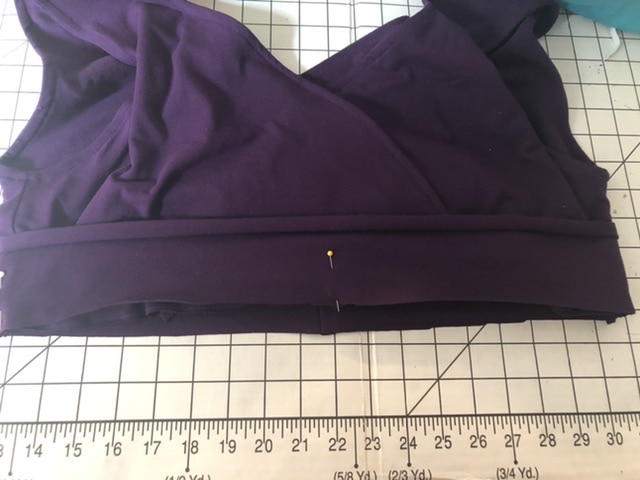
After sewing your bands in a loop, quarter mark the bands and pin them to the inside and outside of the bodice. I needed to stretch the bands to eliminate puckers. This is the place to take your time and sew slow. There are four layers or more here. Be sure to use your stretchy stitch! Once the bands are sewn to the bodice, run a quick zig zag baste around the two raw edges of the lower bands. Trust me, it will save time later! Set your bodice aside to slowly simmer.
Stitch up the side seams on your skirt. Here I serged one side, serged the hem, then measured out a length of clear 3/8 inch elastic to match the length of my band. Quarter marked that and quarter marked the skirt, then stretched the elastic, and serged it on. You can use your favorite gathering method. It occurred to me while doing this, that I could use a gauze, or lawn for the skirt of the Shirtzie, especially if I gave myself another few inches by cutting an inch or so from the fold. We used a woven skirt for the WendyBird a few months back. Similar concept.
Add your skirt to your bodice band, top stitch, hem, and pop on for a fun top that will help you stay cool all summer long. Wishing you happy sewing! Joan