Uncategorized
Arcadia Joggers with a double welt pocket

Happy Winter morning to you from a sunny but chilly New Mexico! I have had this lovely thick bamboo blend fleece in my stash for over a year. It was calling to me to be a pair of joggers that I could wear just about everywhere. Planning to layer them over a pair of leggings at yoga tomorrow to ward off the chill. Next to being cozy and warm when it is cool outside, I always need pockets! While this pattern has two great options, a patch pocket as well as an inseam pocket, I was drawn to the double welt pocket found in the adult version of this pattern. I remember making bound buttonholes years ago in a class, and thinking this is fun, but too complicated to make again. I watched videos on line, and find that I prefer the written instruction better.
The cool part is that Jennifer makes it easy in the Riding Hood Poncho instructions. I printed the two pages from that pattern to get the pocket pieces I needed, read the instructions from that pattern, and added a cool welt pocket to the hip of the right leg of my cozy new Arcadias. Riding Hood Poncho pocket, meet Arcadia Joggers. You can do it too!
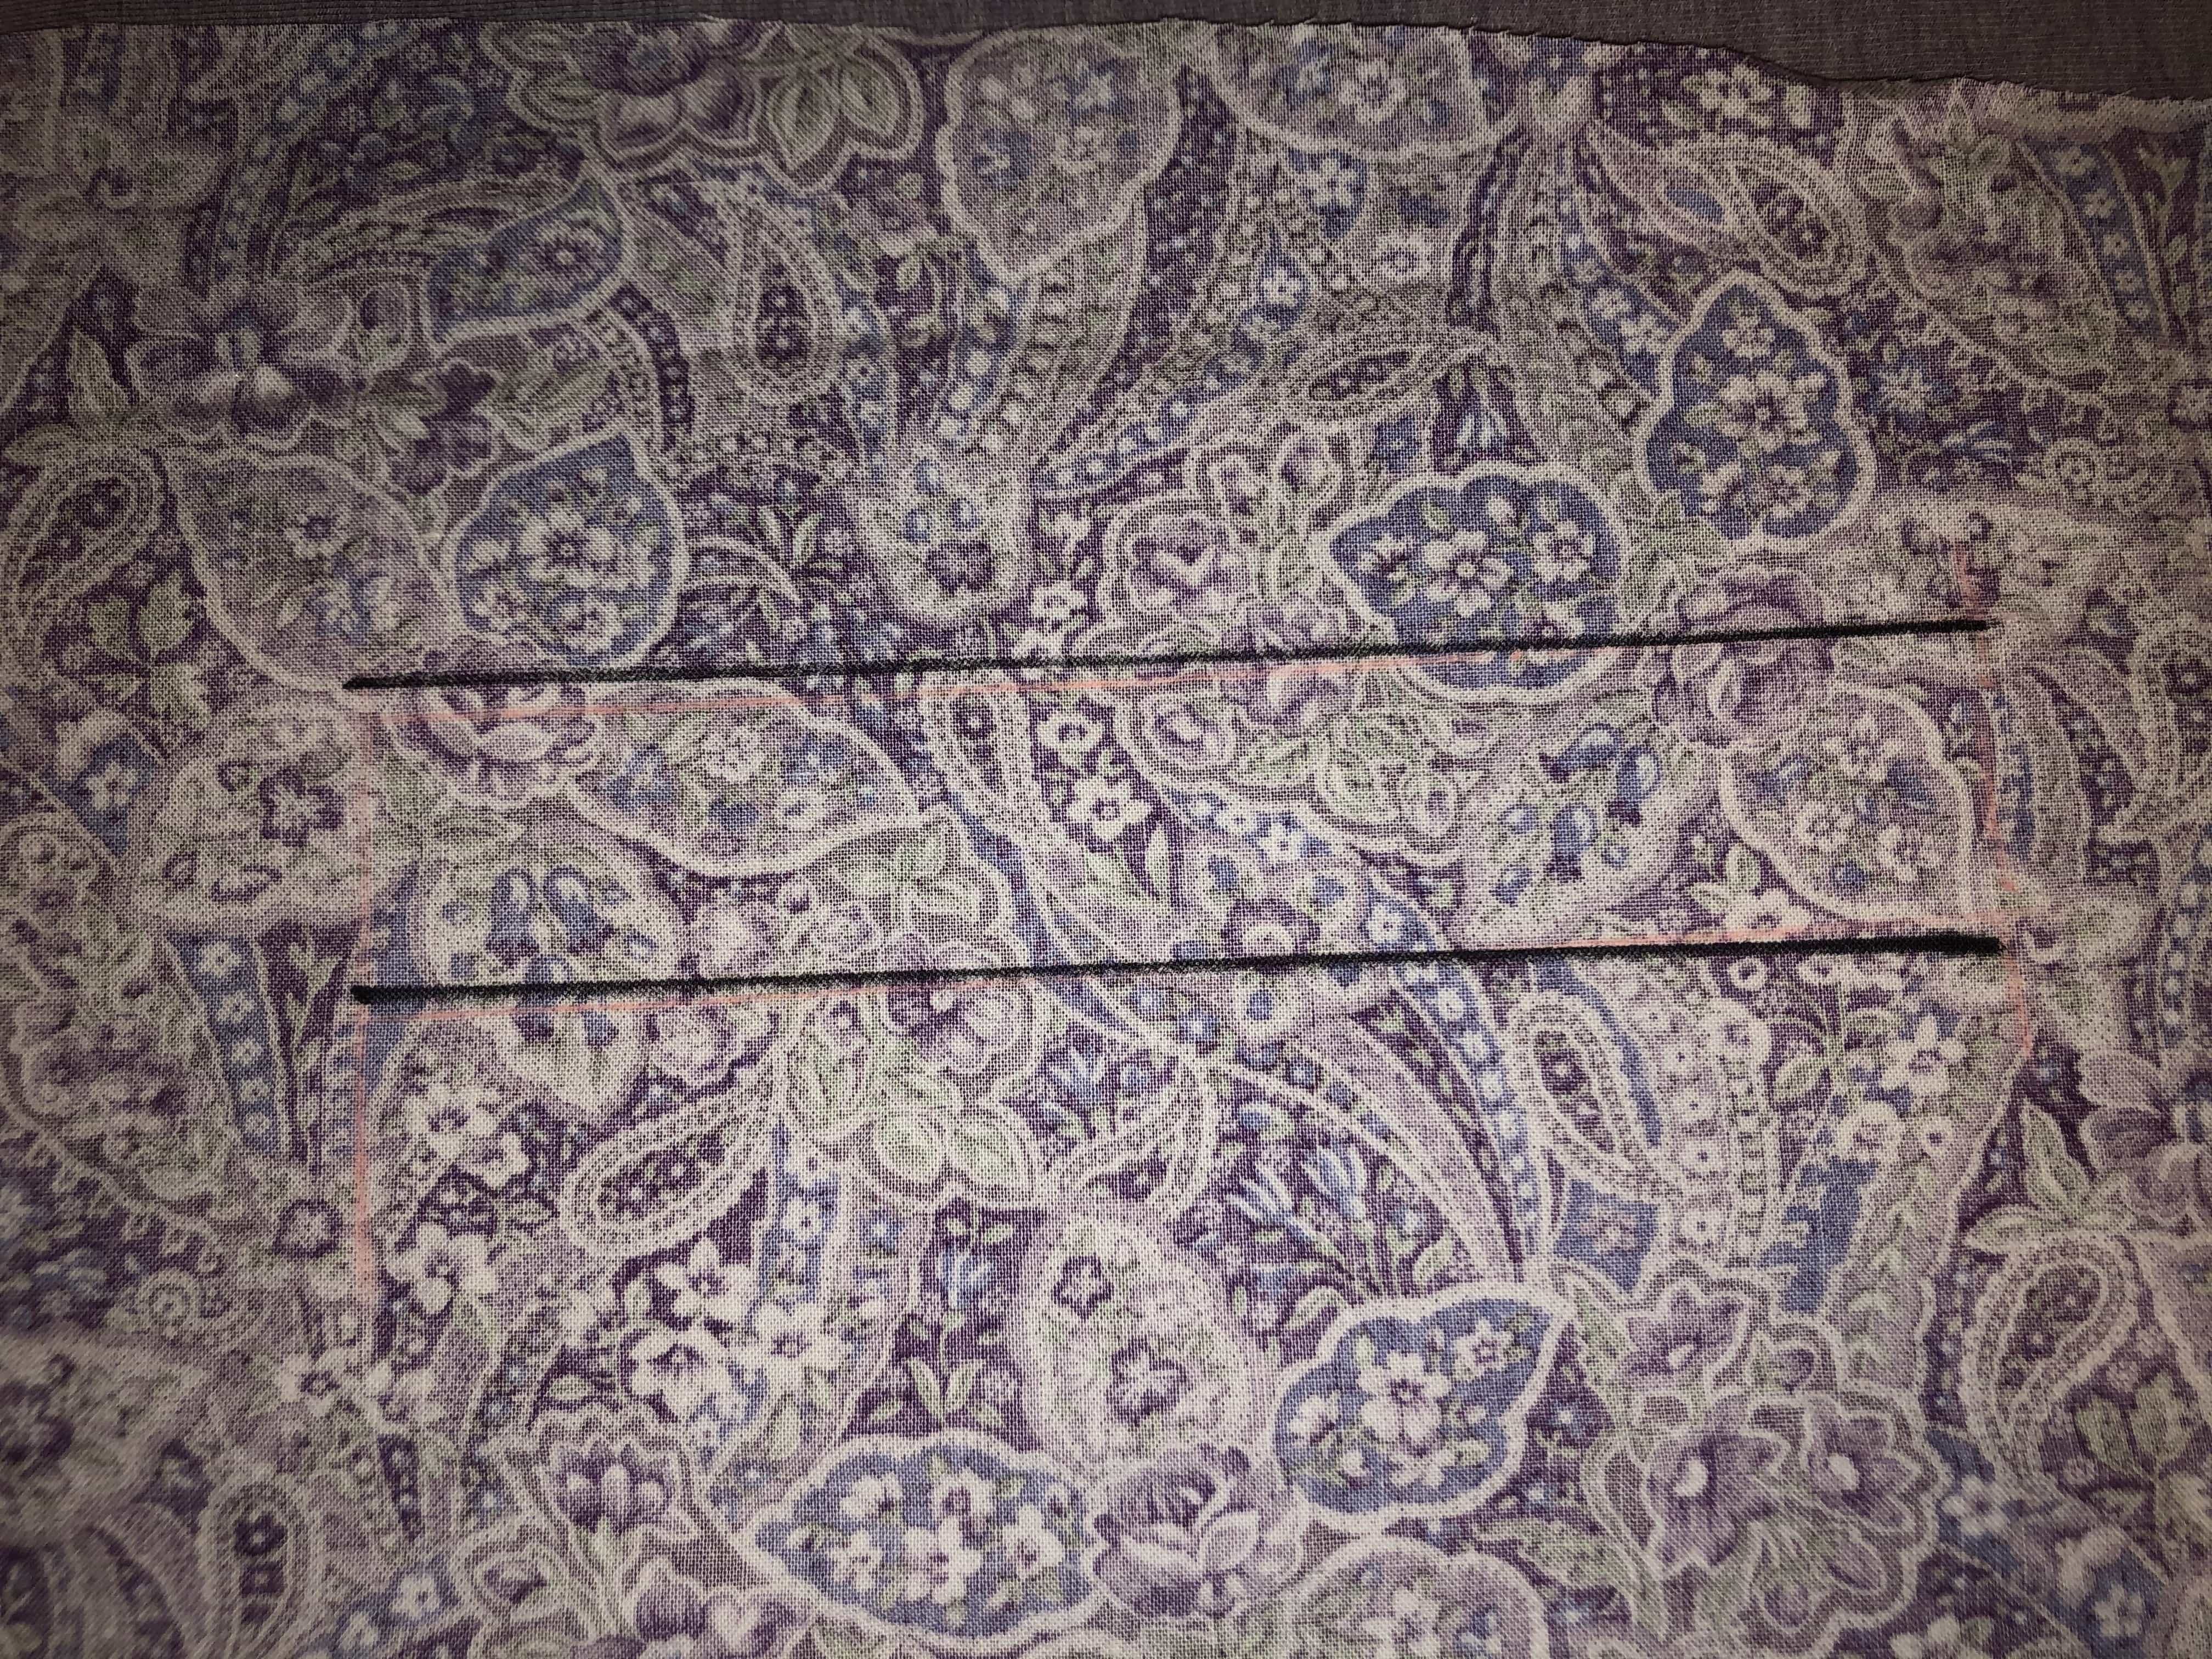
First is the box. I keep a meter stick near my cutting table. I used it to make the sewing lines on my quilting cotton pocket straight, and decided that It made lovely parallel lines, and that with a slightly wider pockets, the straight and parallel aspects were more important than the exact width between the lines. I will be keeping my eye out for more tools to make a narrower set of lines in future.
Here is where I veered from the instructions. Something from deep in my memory told me to shorten my stitch length to a “2”, and sew a box. I started in the middle of one of the long parallel lines and sewed all round the box, taking care to make one diagonal stitch at each corner. This is where I am preparing to make that one diagonal stitch. There is a lot of pressure at the corners, and having two stitches (one one each end of that diagonal stitch) is better than just the one at the corner.
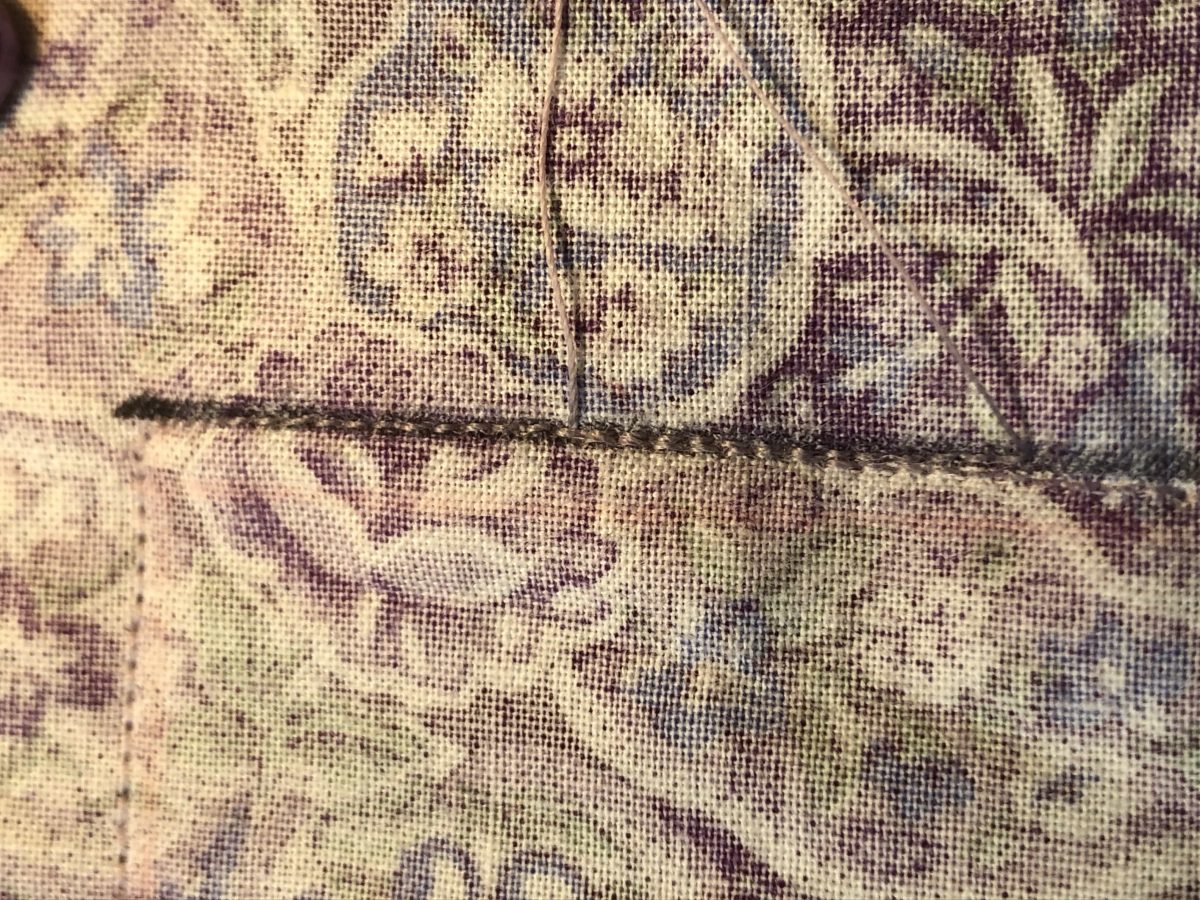
This is a magnified view of the box. You can see that I started sewing near the corner of the box, made that diagonal stitch at each corner, and then stitched right on top of my first stitching. A back stitch adds bulk I wanted to avoid.
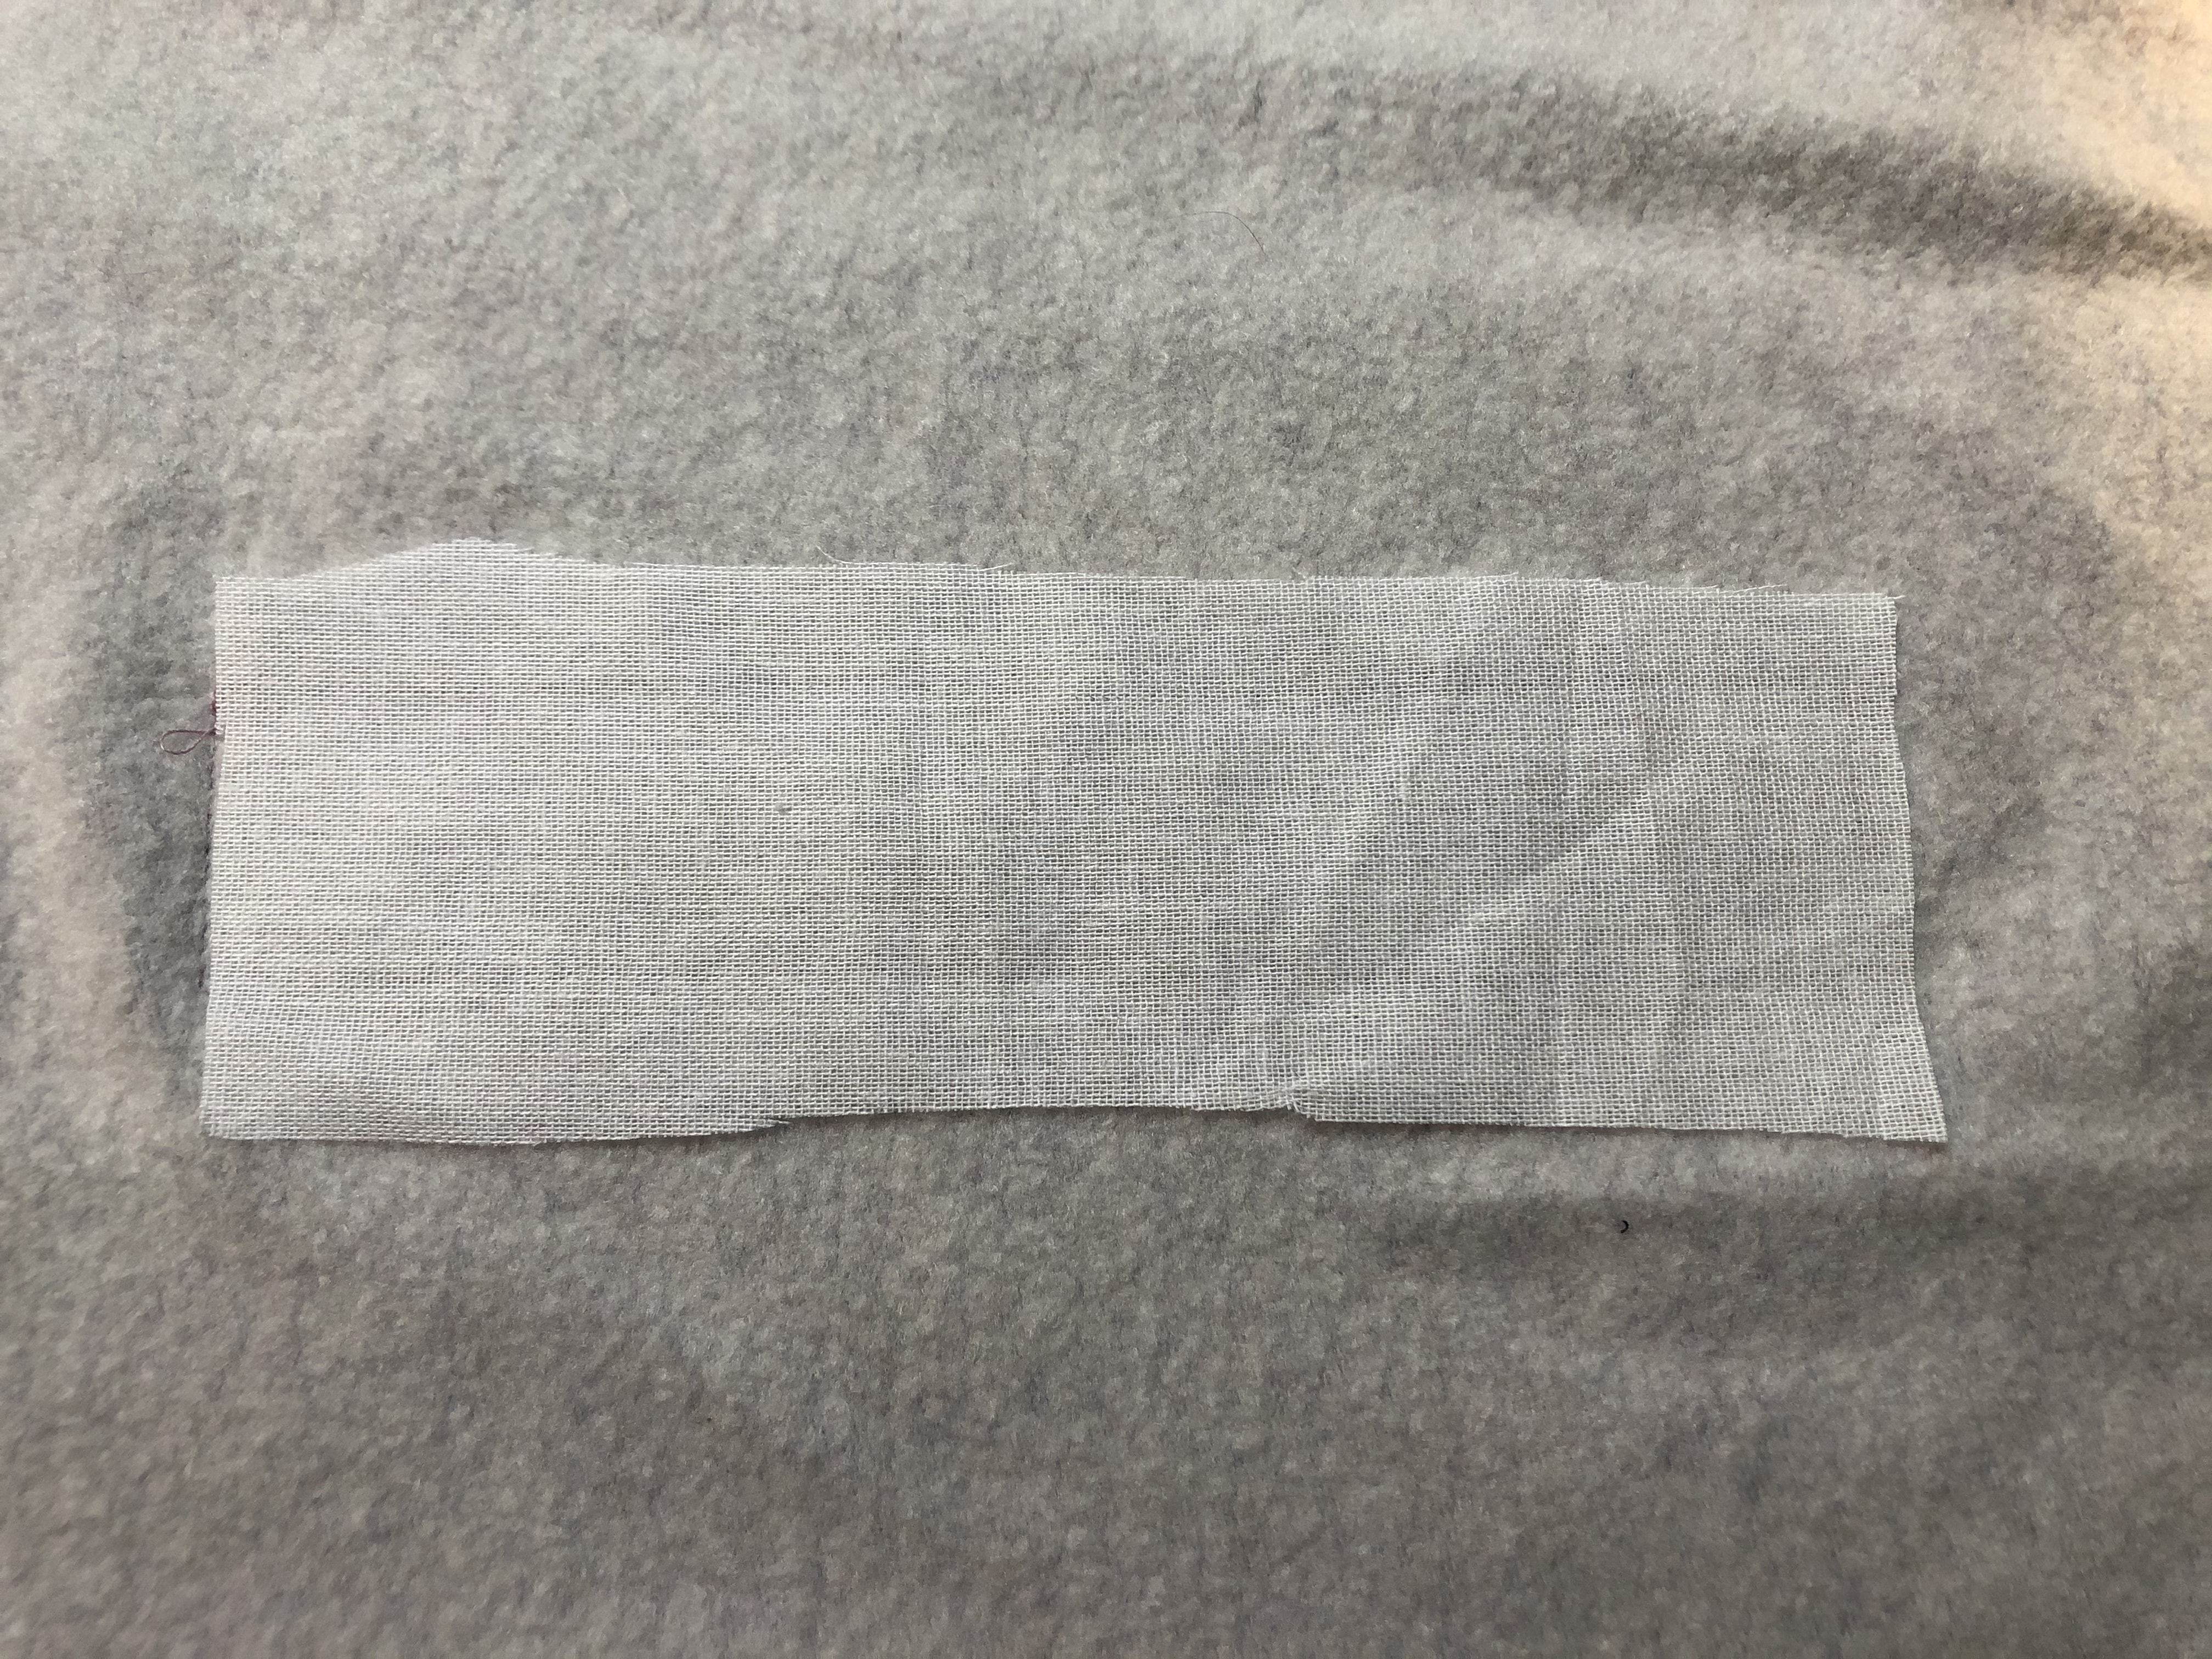
So I am a lazy/efficient sewist, and chose to add the fusible interfacing piece to the box after I stitched it. I wasn’t sure that this shapeflex would adhere to the fleece, but it did. I love this interfacing and find that it is worth the extra cost for the way it behaves. It is woven, does not bubble, and washes well. It saves me time and frustration. Use what you have at hand. I cut the interfacing just a bit bigger than required so that it would be caught when I top stitched around the pocket opening later.
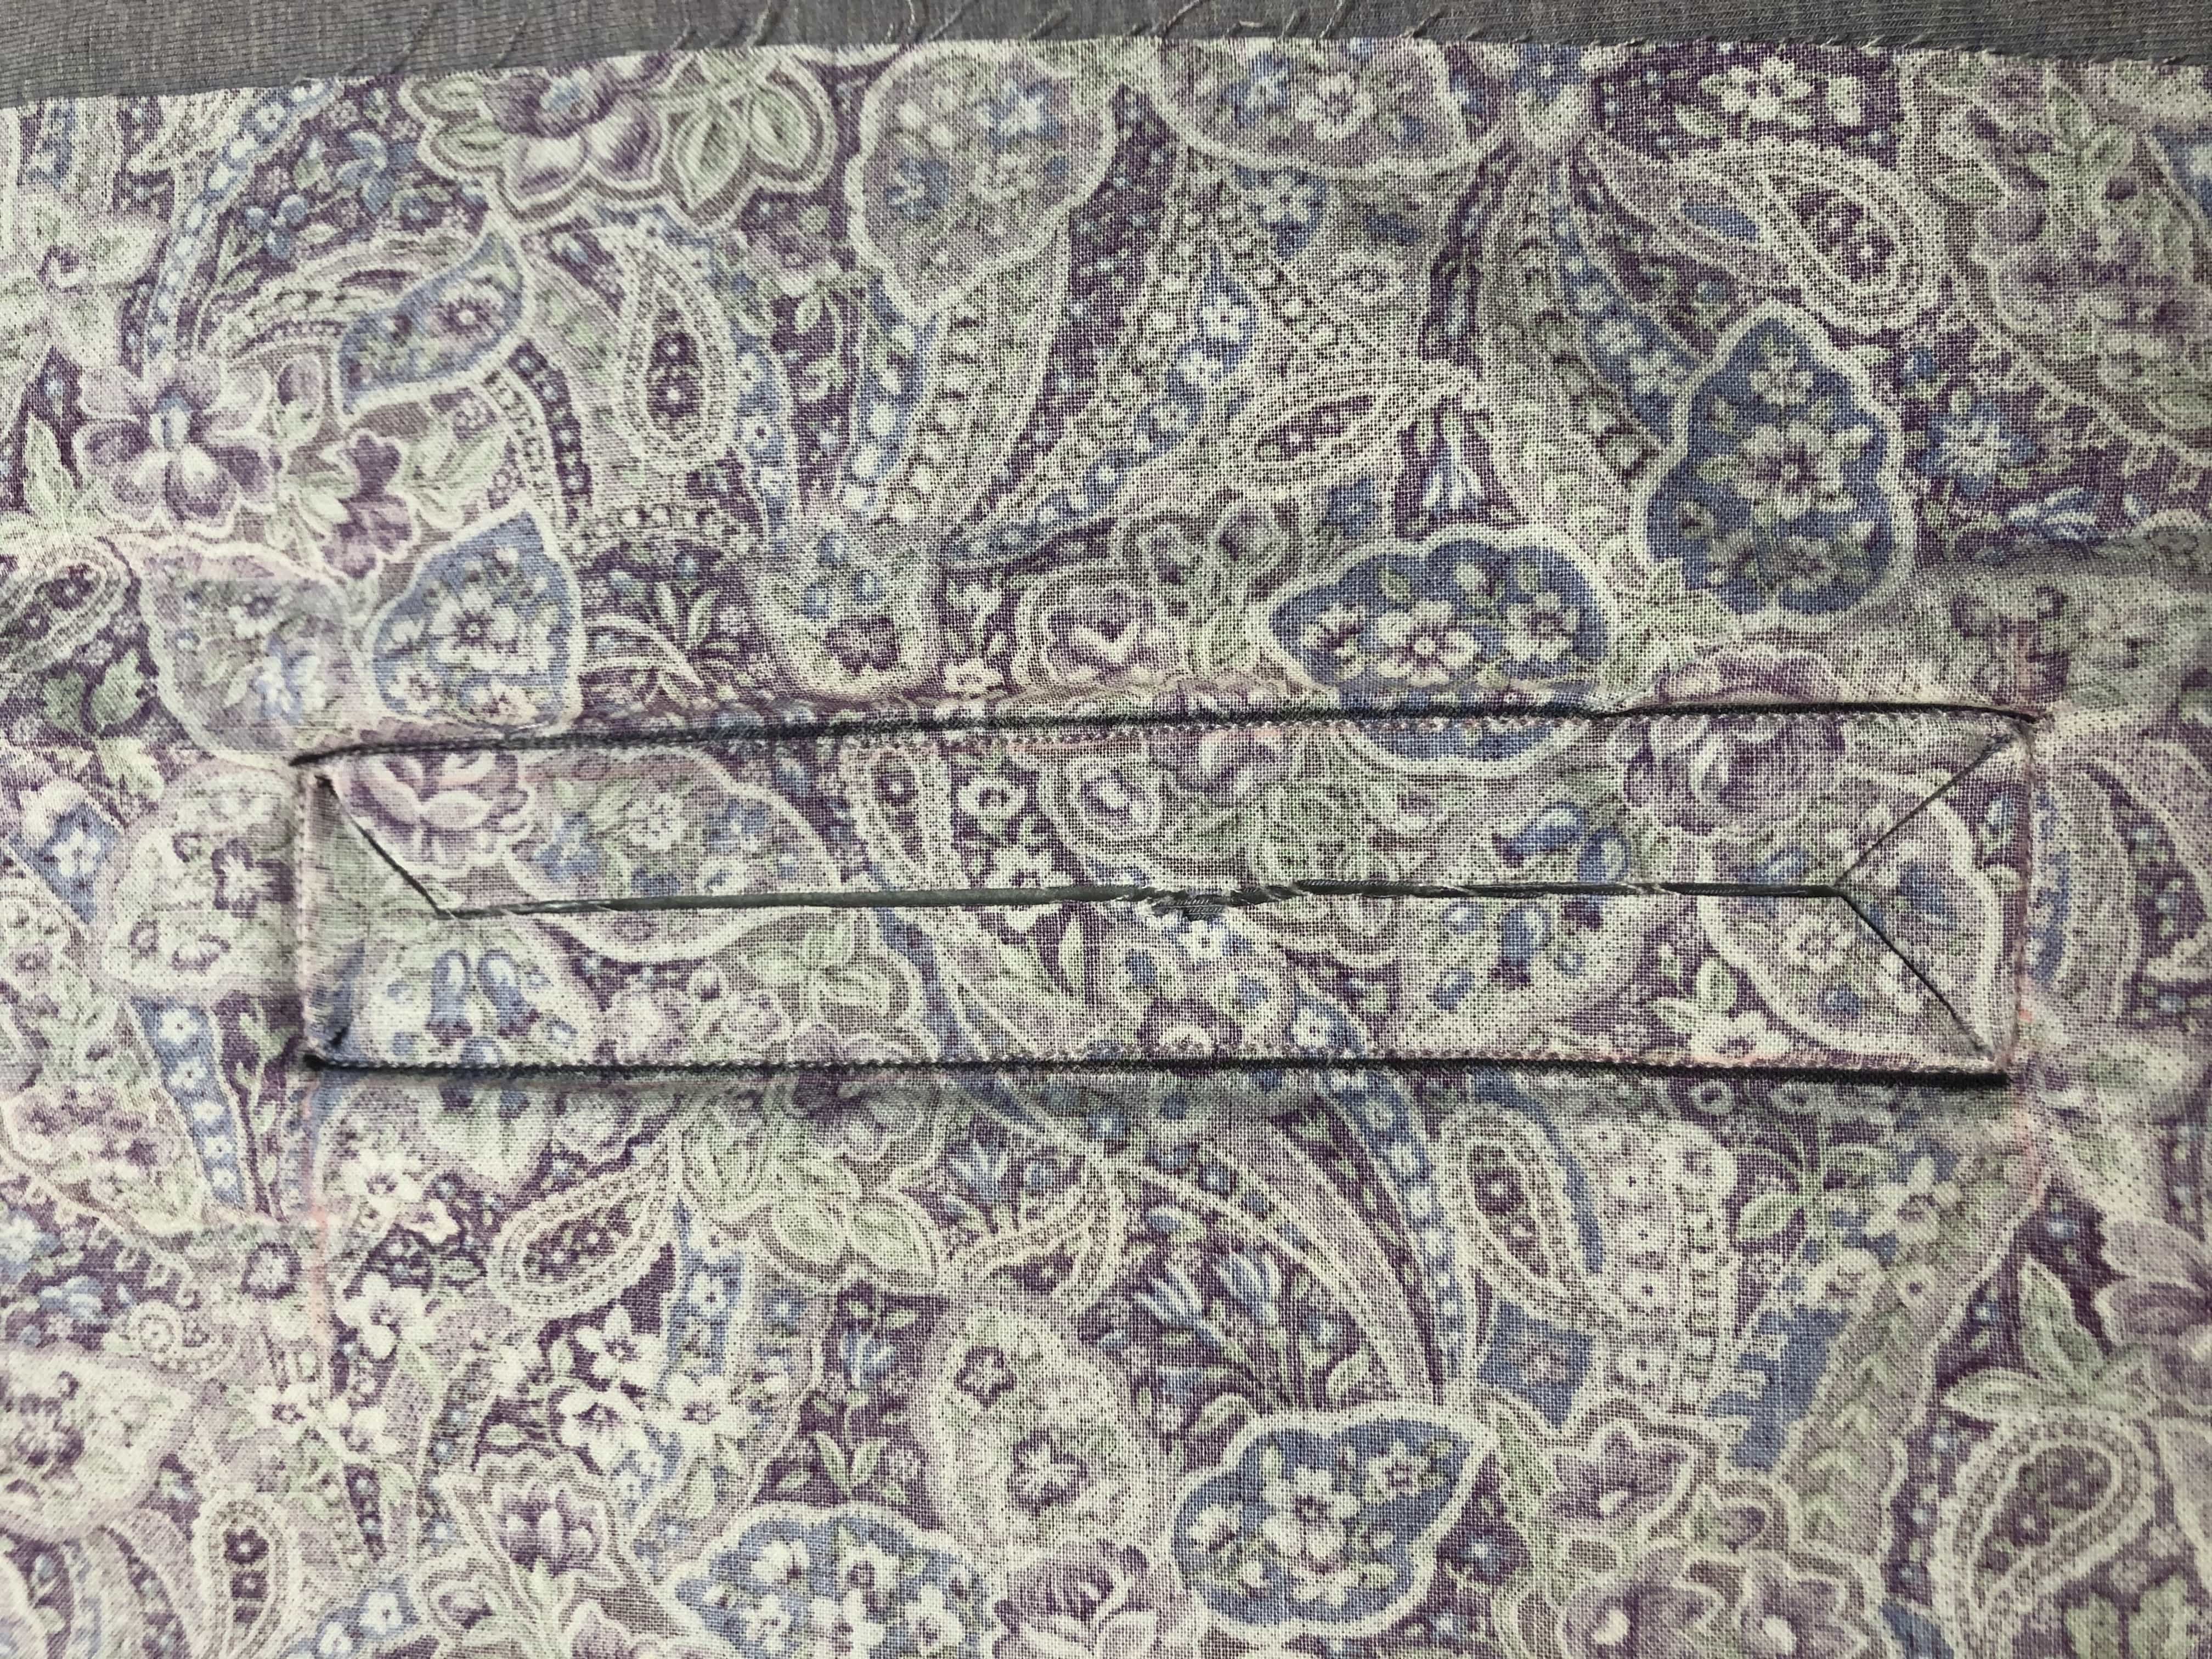
Next, we cut down the middle of the box, with a diagonal at each corner. I did not realize it at the time, but these lines are important to cut straight as the long portions fill the welts, so getting this straight and as close to exact center as you can will serve you well.

Pull the pocket through the opening to the back side of your pants. Those interfaced welts will want to stay where they are, so little pleats, like smile lines, will form on this side where the welts are. Giving your pocket a good press here from the back side as well as the front is critical.
This is pressed, but not yet stitched. Two things are wonky in this photo. First is that the lines of the knit are going sideways. Yes this fabric had a lot more vertical stretch than horizontal stretch, so I cut accordingly. It did cause me to stop and think along the way. Second, the pocket is not really even, and there is a wrinkle a couple inches from the left on the bottom lip. With a little tugging and straightening, and re-ironing, I managed to get the welts a little more even. From the back side, those smile lines were pinned, and you can see the pin from the front on the edge of this picture.

Wrinkle is gone, welts are more even, so time to top stitch. Since I did not follow Jennifer’s wonderful instructions to the letter, I wanted to be sure those triangles were secured, I top stitched the short sides on the Joggers fabric edge, and the longer lines on the print. 
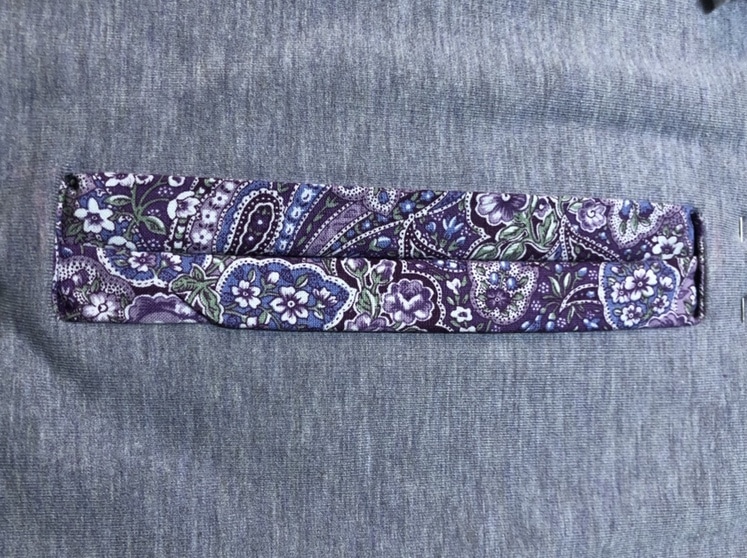
From the back side flip the pocket up to create the bag. Stitch around the three raw edges. Since I hope to wear these Joggers many many times, I serged the edges to keep them tidy. Then I top stitched the top and two sides to my joggers, just to keep them in place and from pulling. They would have been fine without the top stitching. I like top stitching.
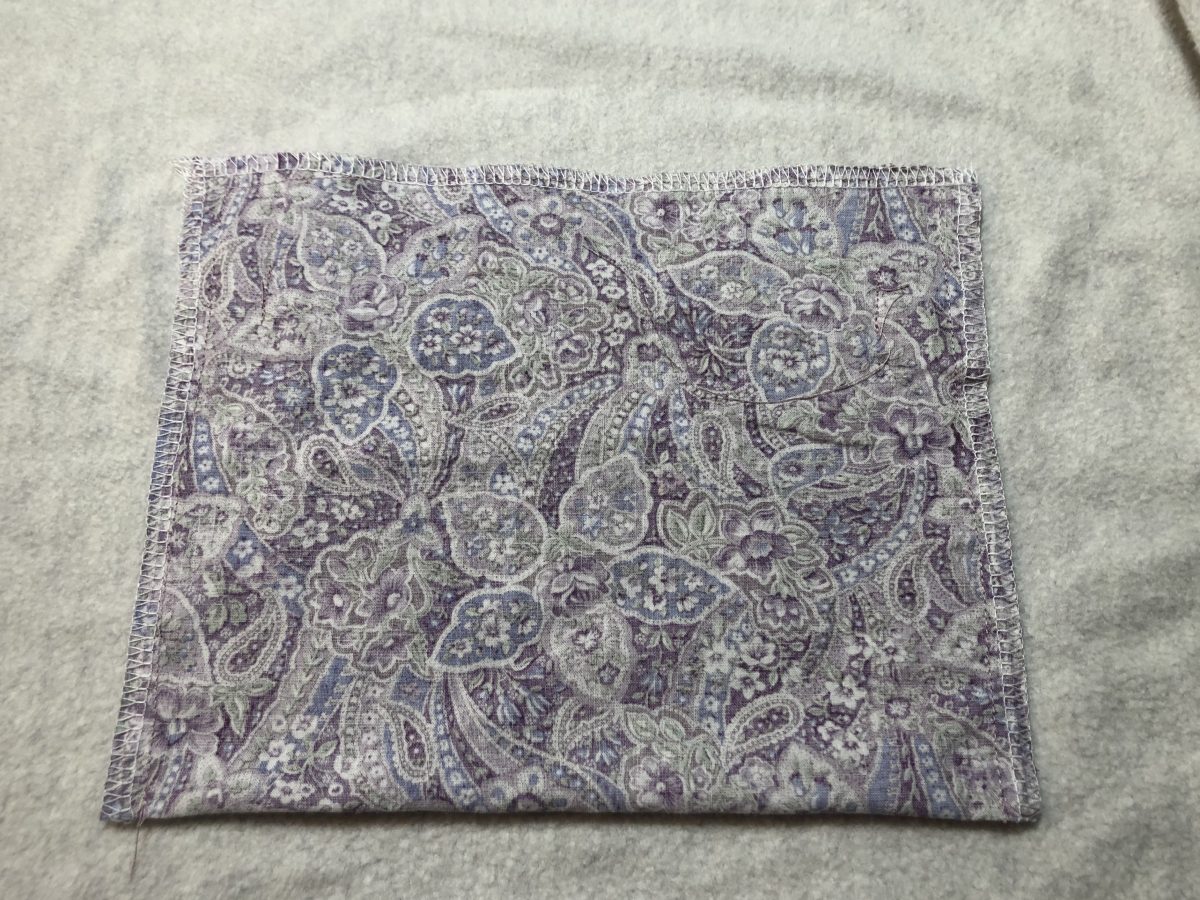
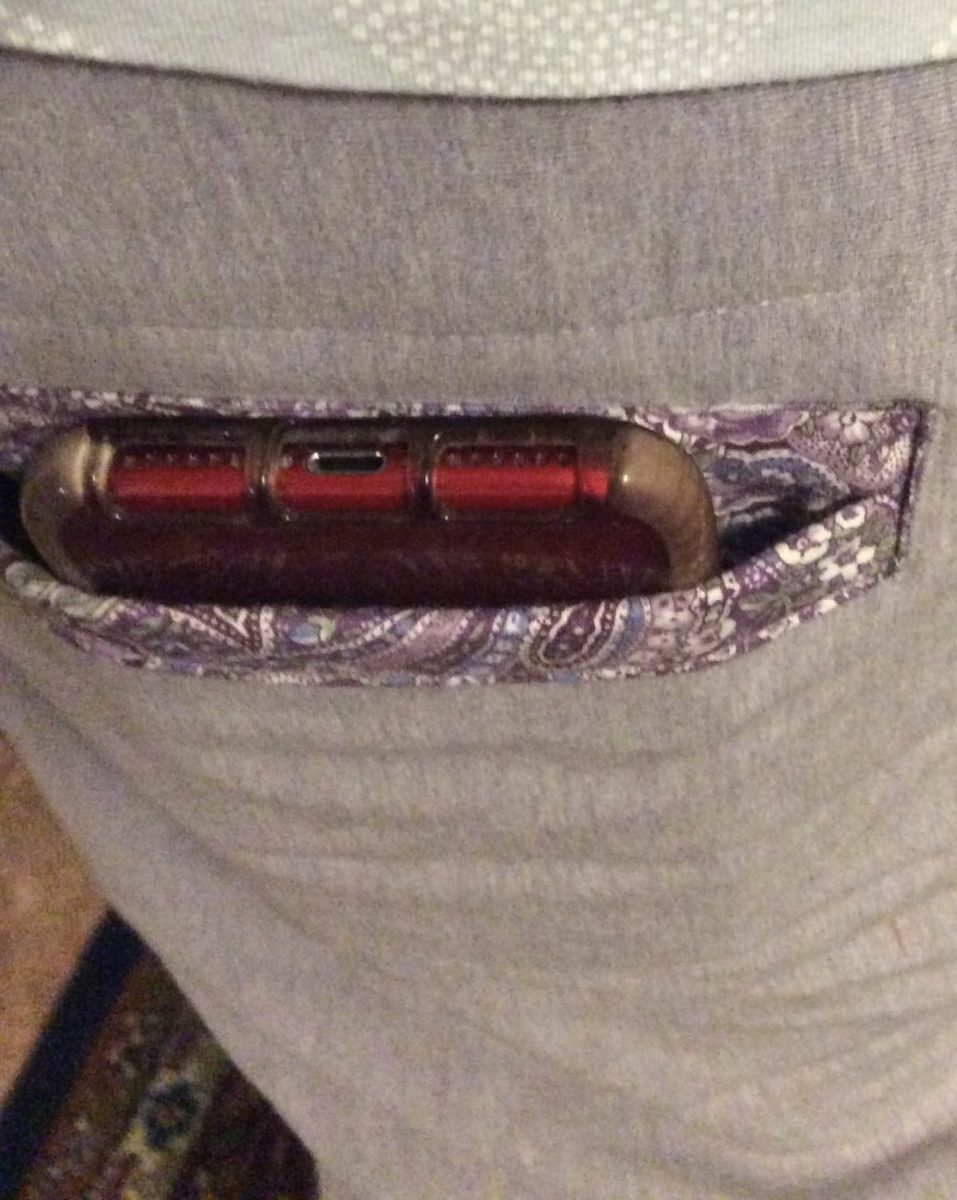
I used an up-cycled piece of cotton for the lining, so my pocket was not quite as big as the pattern, but it works for the job intended! My phone will slip down sideways and be perfectly hidden, but easy to reach. After my pocket was in place, I sewed the pants as instructed. I love that even sewing on this thick sweatshirt fabric, my pocket is slim and not at all bulky.
Arcadia, meets Riding Hood for the pocket win. The best thing about these pockets is that you can orient them anywhere. On this pair, I used the meter stick to measure from crotch point to crotch point and popped that pocket dead center. Vertical or diagonal pockets where a front pocket normally is would be great. My son will get a back pocket on his Arcadias next time.
Hope you enjoyed this. Please be sure to tag your makes with #ridinghoodpockets I cant wait to see your pockets! Happy Sewing! Joan