Tutorials
Seneca Color Blocked- An Easy Mod to Refresh a Favorite Pattern
Apr
Happy day to you from a brisk and sunny New Mexico. I am thinking ahead and looking to wear short sleeves. For now there will be a cardigan over for the cool mornings, which can be removed as temperatures rise. Instructions on how I changed up my Seneca follow.
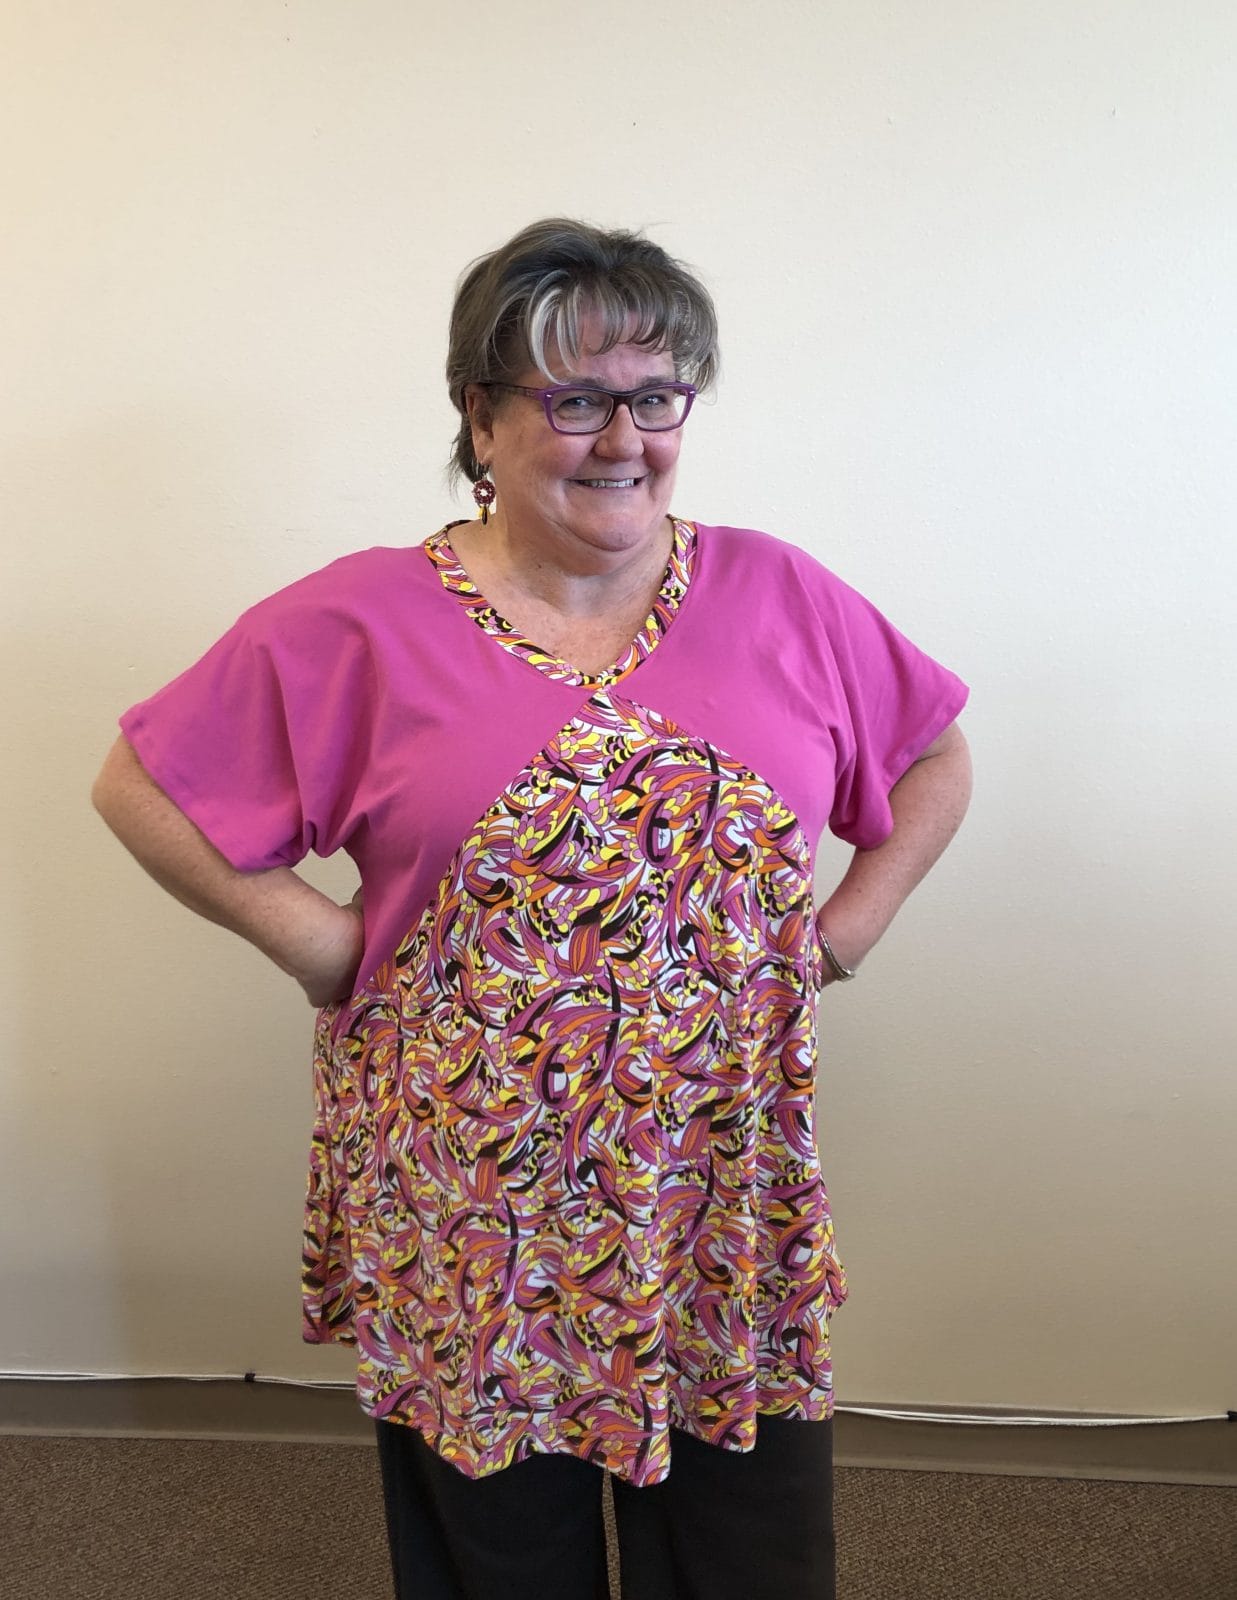
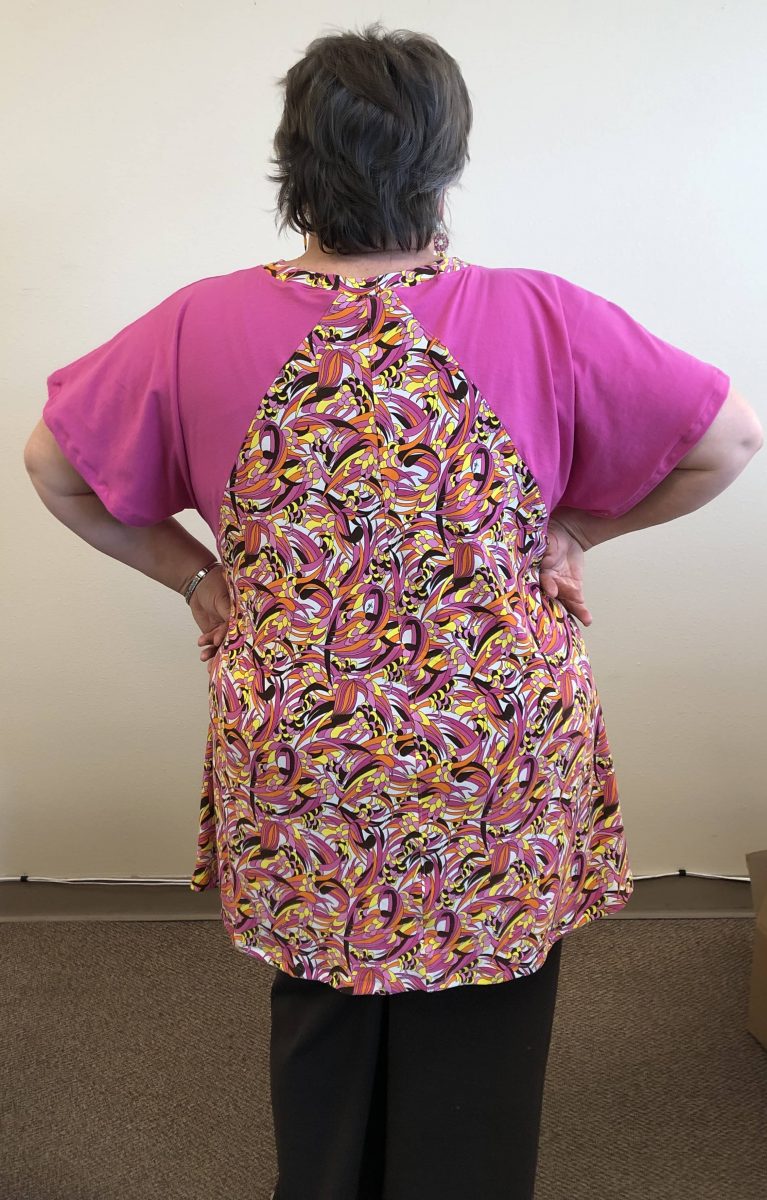
Either the top or tunic length will work for this, I’m wearing the tunic length in this photo. Color blocking allows you to take advantage of the camouflaging powers of a busy print like this. The whole top in the print would be pretty overwhelming, and bringing in a bit of solid balances it out. It also allows you to use a print or color that you like, that may not like you back as much, by moving that away from your face, as in the body of the Merryweather Top and Dress.
After printing out your pattern pieces, draw a diagonal line on the Front piece from the center front neckline to the point on the side seam where the blue line for view B intersects with the side. For the 3 largest sizes, you will need to extend that blue line. Cut the Front piece along the line you drew.
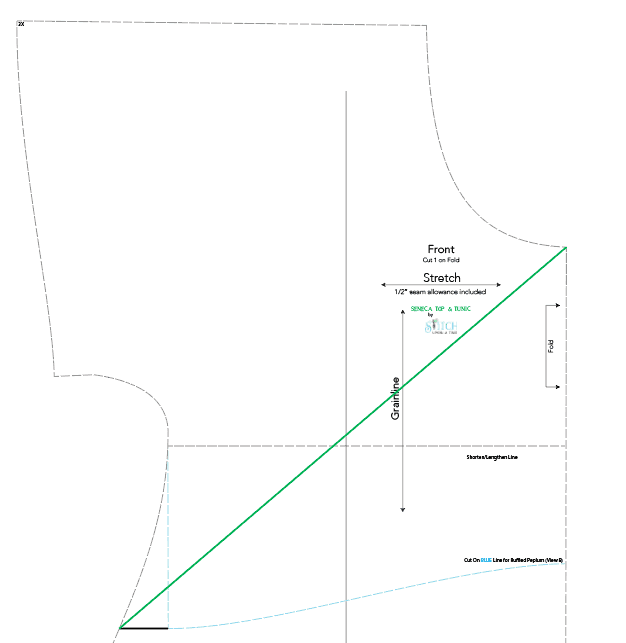
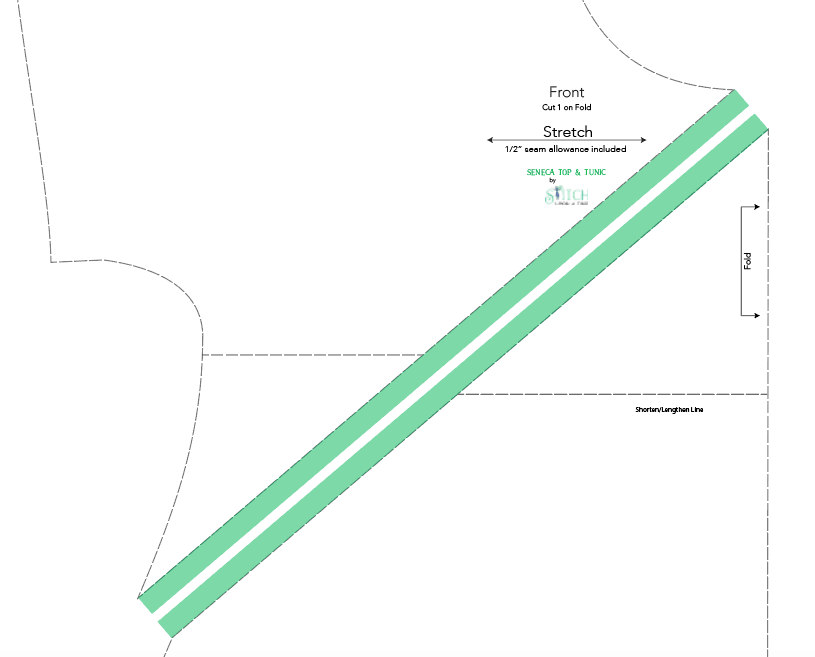
Use a strip of paper to add 1/2 inch seam allowance to the diagonal line you drew. Be sure to clearly mark that this is the front or back and mark the stretch line and neckline since the curves for the under arm and the neckline will look similar. Add the 1/2 inch seam allowance to the diagonal line on the bottom portion of the Front piece as well. It will look a little like a triangle with a curved bottom. Mark where your side seam and angled seam intersect.
Repeat these steps with the back piece.
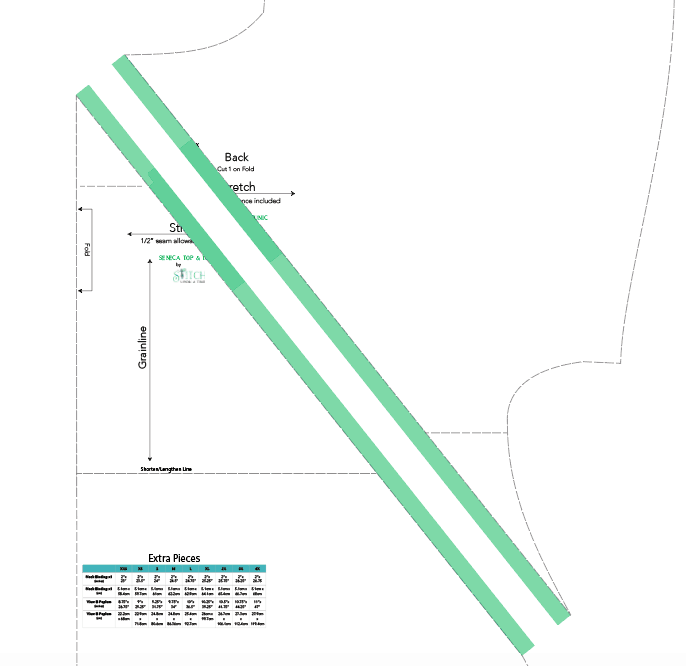
Cut your neckband according to the chart.
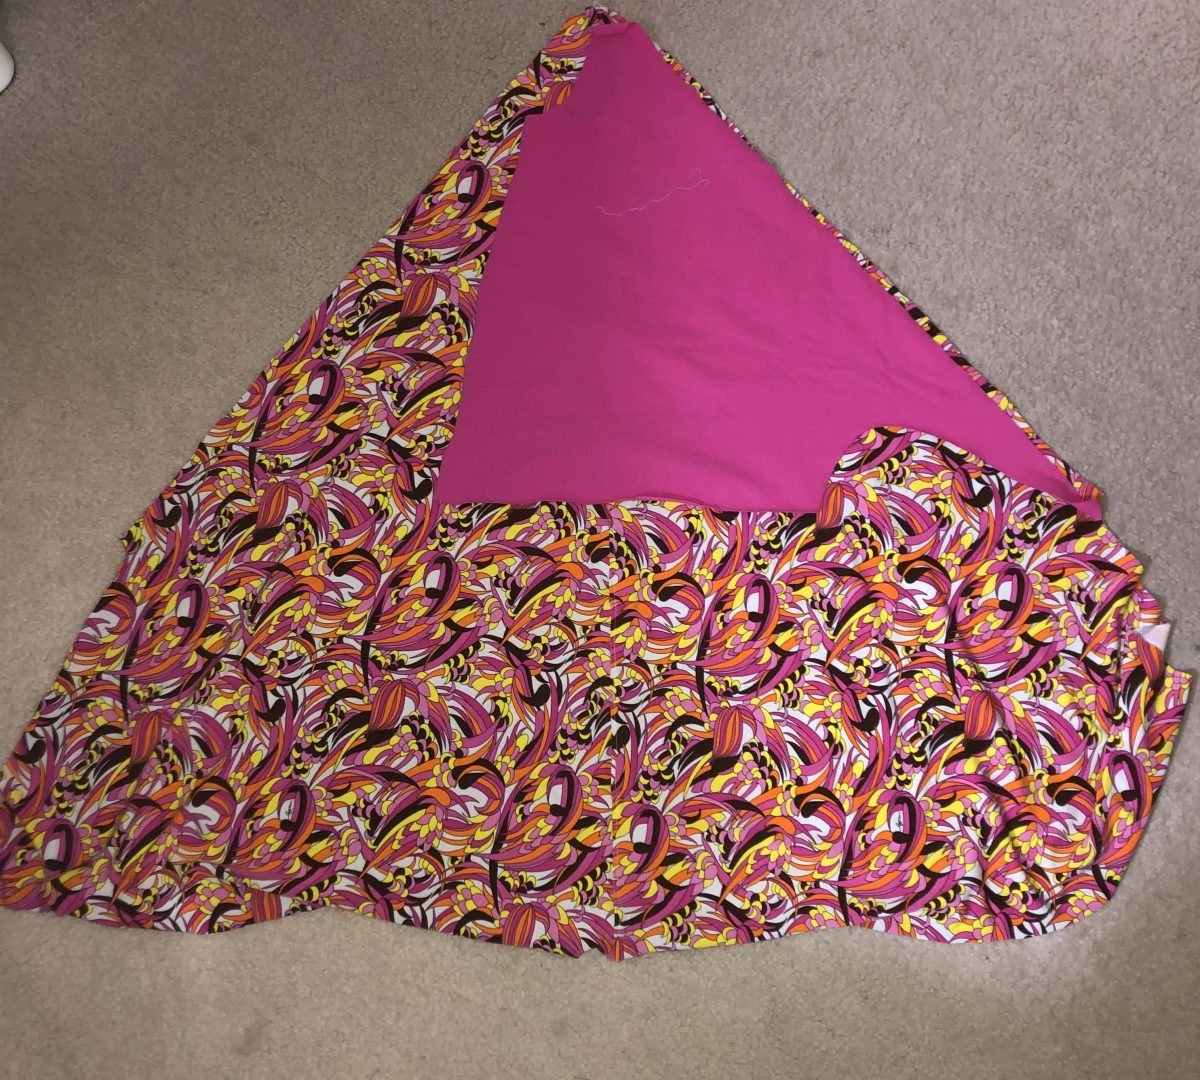
I found that if my fabric is non directional, and if I don’t mind adding a seam allowance to the center back, these pieces tessellate snugly together. Saving fabric for the win! The upper portions also nested nicely on my fabric.
The two versions I have made so far have used a busy print for the lower section and a solid for the upper sections. I was happy with the drape and swing of a rayon spandex for the body. I used a solid Art Gallery Cotton Lycra for the upper sleeve area.
On to the sewing! Seam your back sections if you need to. Lay out the top back pieces so that the diagonal edges are aligned and top and side edges match. Sew this seam. I serged and then top stitched. A zig zag or your favorite stretch stitch will work too!
Open this up and sew the next side the same way.
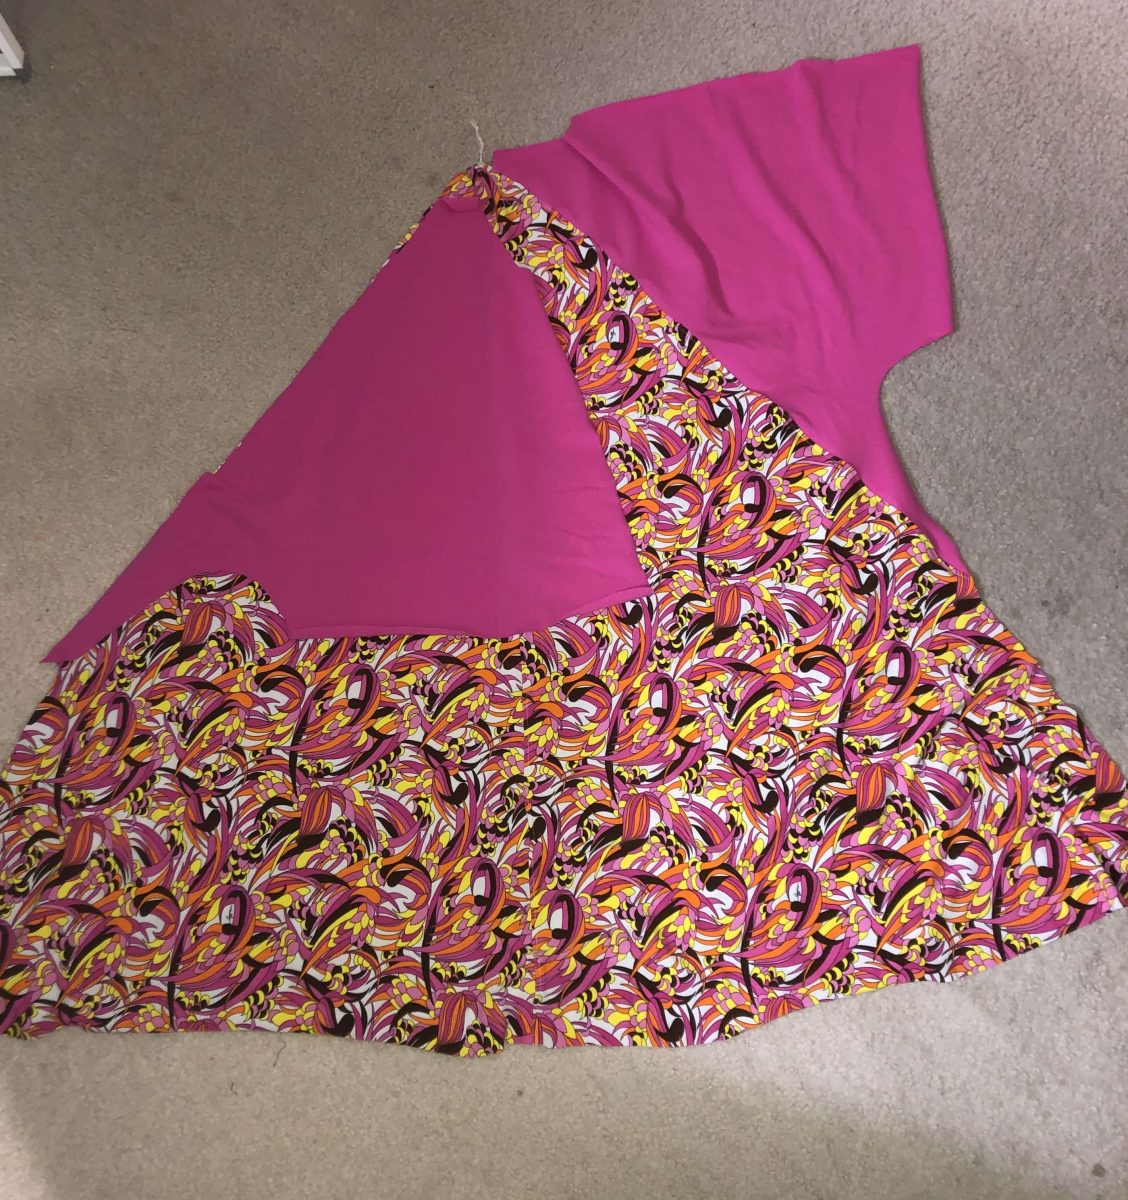
Do the same with the front pieces. Notice how that front curved neck gets a little more of a v shape.

Sew across the shoulders as in the pattern instructions. You can choose to leave part of the shoulder seam open like I did in my previous post, or just sew straight across. The side seams will need a little care to match up the top and bottom seams. Since this point will show on the outside of the garment, it is worth the extra step of basting to ensure that the seams do not slip.
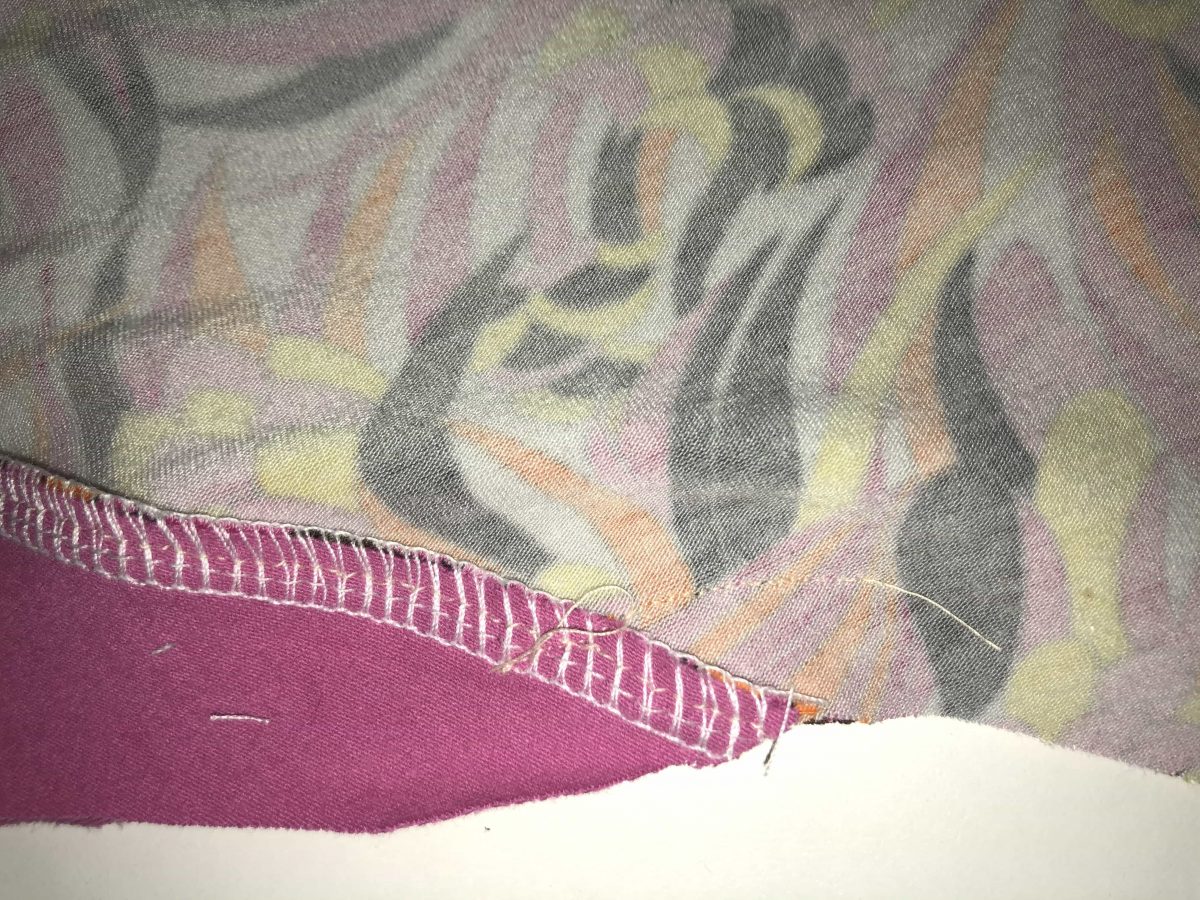
Once I had this pinned so that the seam from the solid to print matched perfectly, I basted that inch or so with my sewing machine and then sew or serge the entire side seam.
Once you have one side seam sewn, serge the other side seam.
Add the neckband as per pattern, hem the sleeves and the bottom of your new top, put it on and enjoy! One note on adding that neckband- since this hack makes that front neckline form a more v shape than curved shape, you will want to really stretch the neckband one inch either side of center front, so it lays flat when worn. Or you could just recut the neckline so that it’s the same shape as the original pattern pieces.
I really love the simplicity and great fit of this pattern, and creating the hack is a nice way to spice up a tried and true pattern.
Thanks for reading and happy sewing!
-Joan
Joan, I thought you were my sister when I saw your picture! I shared it with her and she agreed. We both like the top! If I ever find my serger (it’s somewhere in a box since I moved) I’m going to make this. Thanks!